Configure single sign on (SSO)
Shoreline Design supports single sign on (SSO) using the OpenID Connect (OIDC) protocol. This feature is available for all users wishing to log in to Shoreline Design through their identity provider (IdP).
There are many OIDC providers. This page details how to configure SSO using Microsoft Entra ID.
Configure SSO in Shoreline Design
- Contact your Customer Success Manager to enable SSO.
- Go to Team Settings.
- Click the SSO tab.
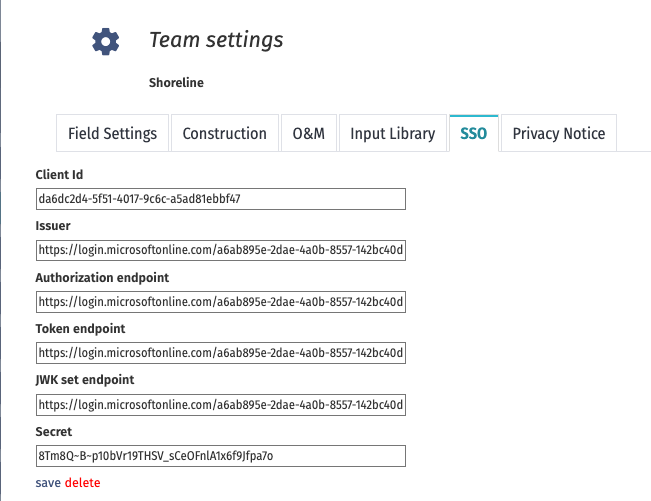
- Populate the fields.
- Your inputs here will depend on your IdP. We provide instructions to configure Microsoft Entra ID.
- Click save. You will see the screen below.
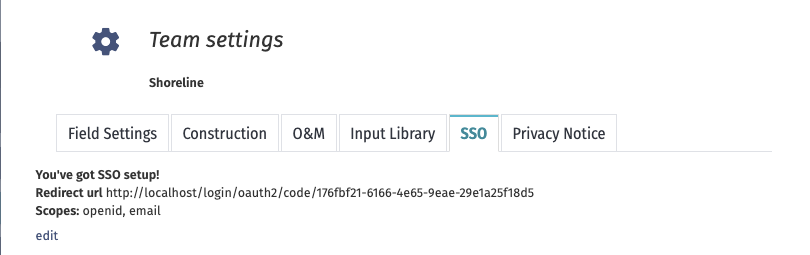
- Copy the
Redirect urlandScopesvalues and input them into your IdP provider's platform.- In Microsoft Entra ID:
- For the
Redirect urlgo to Authentication, click on Add a platform, and select Web.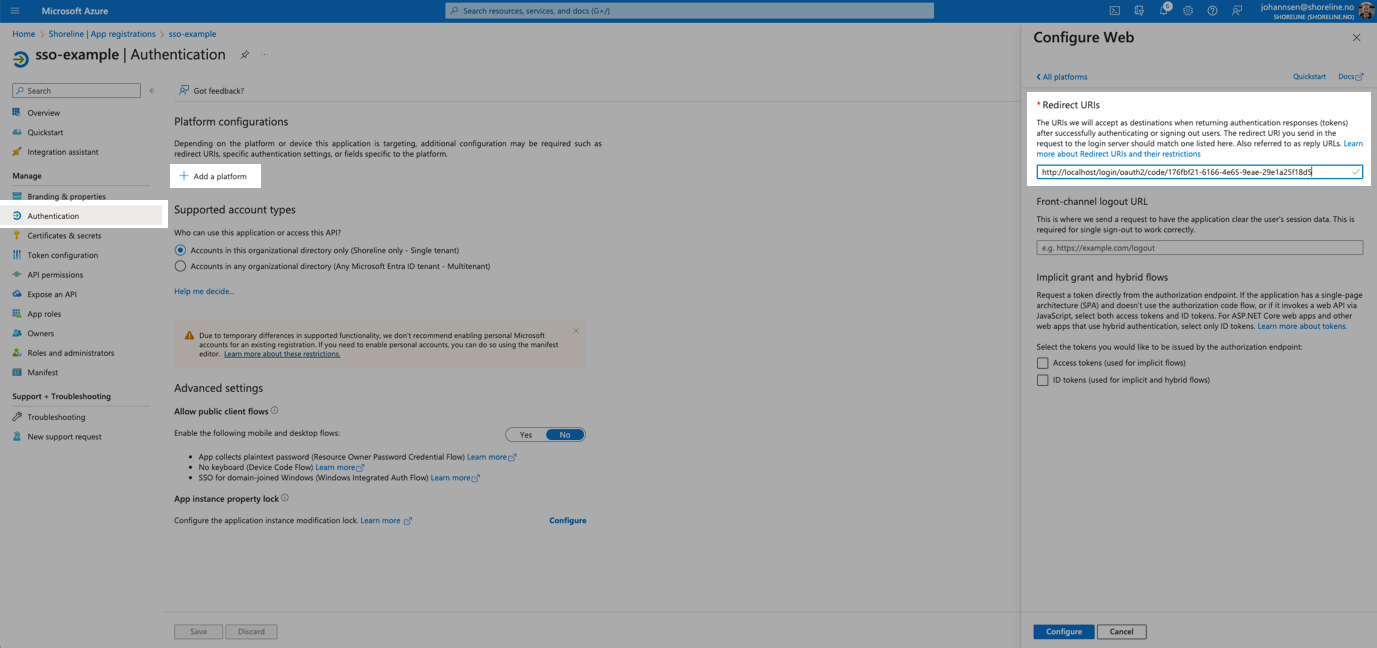
- For
Scopes, go to API permissions and click Add a permission.
- For the
- In Microsoft Entra ID:
You can now log in to Shoreline using SSO.
Configure Microsoft Entra ID
- Register a new app in Microsoft Entra ID with the required parameters.
- Note: Do not add a redirect URI. You will add this value later.

- Note: Do not add a redirect URI. You will add this value later.
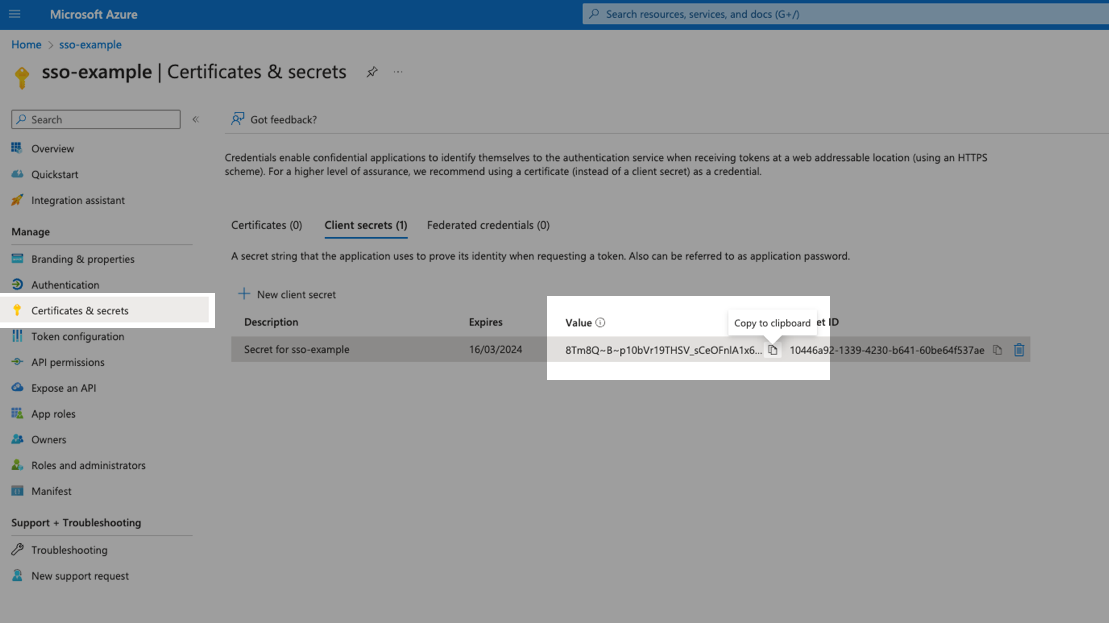
- Click Certificates & secrets in the left-hand menu.
- Add a client secret and copy and store the value.
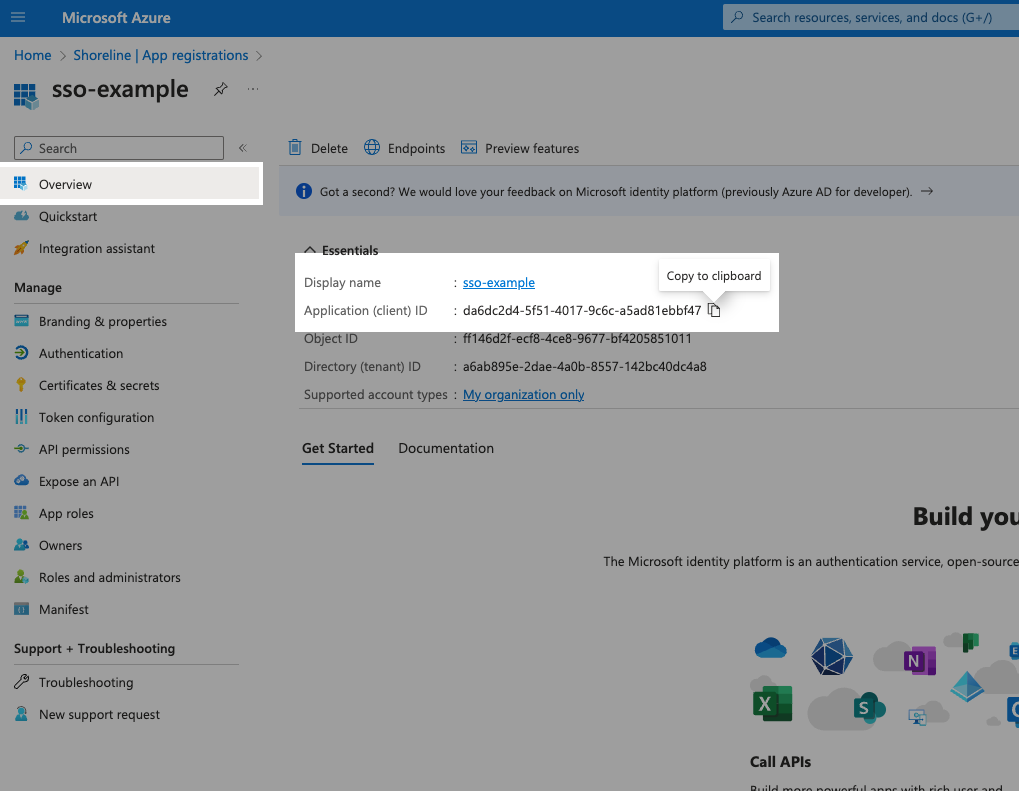
- Click Overview in the left-hand menu.
- Copy and store the Application (client) ID value.
- Click the Endpoints tab.
- Copy the OpenID Connect metadata document URL.

- Open the URL in your browser and copy and store the following values:
issuerauthorization_endpointtoken_endpointjwks_uri
- Configure SSO in Shoreline Design using the values you have copied and stored.