Fixed bottom
This guide helps your build a simple Construction O&M case featuring 10 8-MW fixed-bottom WTGs off the coast of Esbjerg, Denmark.
As part of the guide, you will learn how to add a base, assets, and logistics. You will also set up simple scheduled and corrective maintenance tasks on your wind farm and add the required logistics.
Prerequisites
You will need to create a case.
Step 1: Add a base
You will need to create bases in your Input Library before you can add them to a case. If necessary, perform the following steps in the Input Library first, then add the base to your case.
- Click on the Build tab.
- Click on the Bases tab.
- Click Add.
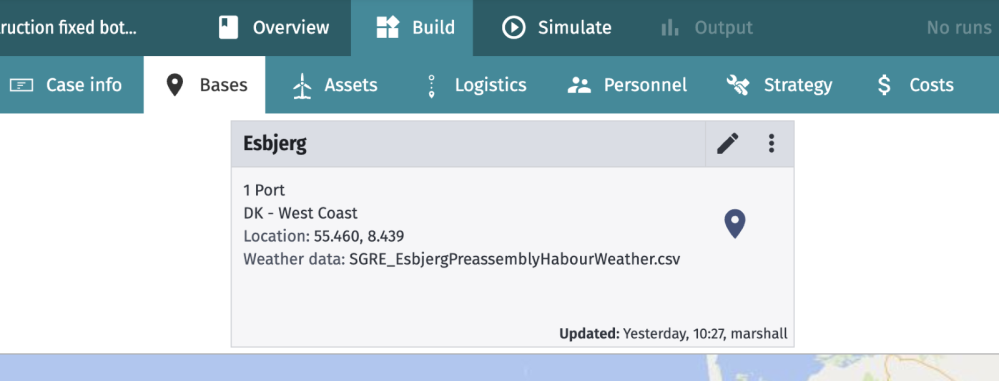
- Choose Esbjerg.
Step 2: Add weather data to your base
Weather data is essential for the Shoresim simulation engine to model your Construction cases. You will need to add weather data to your base and your assets (step 3.
- Click on the Esbjerg base card that you added to your case.
- Click on the Weather tab.
- Select a weather square for the base. Those which are coloured green have ERA-5 data pre-downloaded (so are quicker to load), but in either case it is possible to download ERA-5 weather data. Click on the square and select Use ERA5 data. This data should appear to the left.
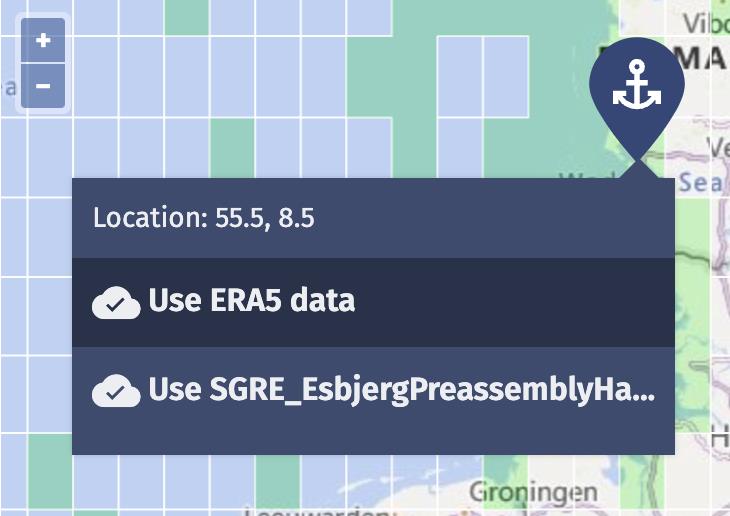
- Click Save to exit.
Step 3: Add and configure your assets
We’re going to add 10 instances of a single asset, an 8-MW WTG. On these assets, we’re going to add a scheduled and a corrective maintenance task.
- Click on the Assets tab.
- Click Add.
- Select an asset on the Wind turbine tab by clicking on the Add instance(s) to case button. If there isn’t an 8-MW asset, add a generic one.
- In the Number of Wind turbines to add input, enter
3. - Click Define site area.
- Click Mark corners on map.
- Mark a location off the coast of Esbjerg.
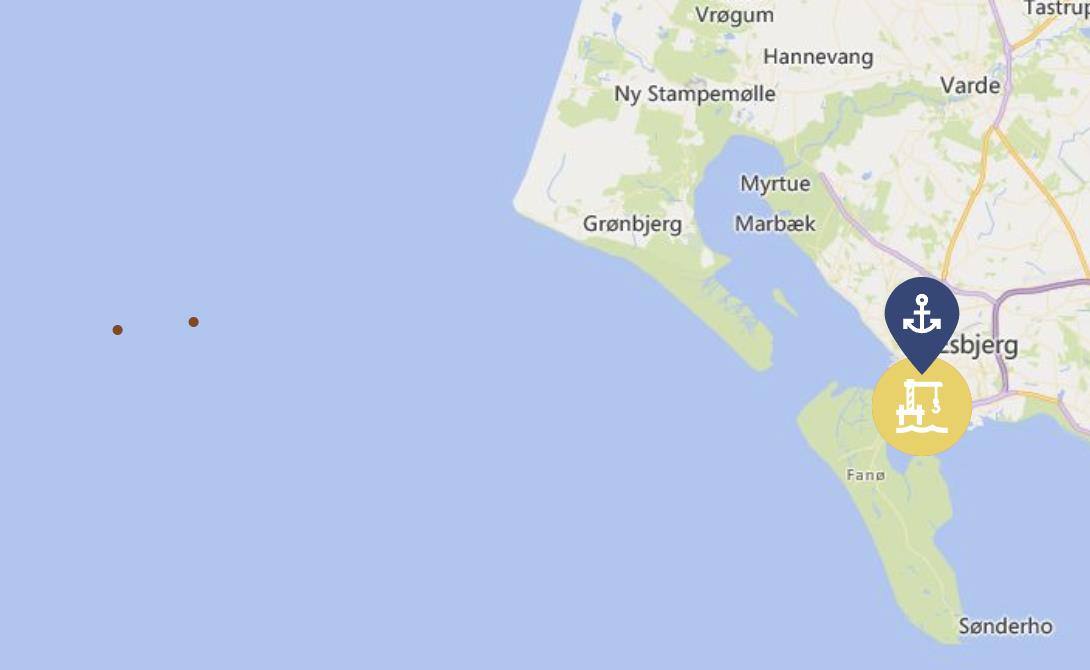
- Click Populate site.
- Click Next.
- Click on the Parameters tab.
- Make sure Rated power is
8and the Nacelle height is100m. - Click on the Weather Criteria tab.
- Click Add entry.
- Enter the following criteria:
- Title:
Work in nacelle - Max wind speed:
18m/s - Wind speed reference height:
100m
- Title:
- Click on the Scheduled maintenance tab.
- Click Add scheduled maintenance on the left side.
- Enter the following settings:
- Name:
Annual inspection - Recurrence:
1year - Vessel: Check Crew transfer vessel.
- Limitations: Check Work in nacelle.
- Personnel:
Service technicianx2 - Total person hours:
24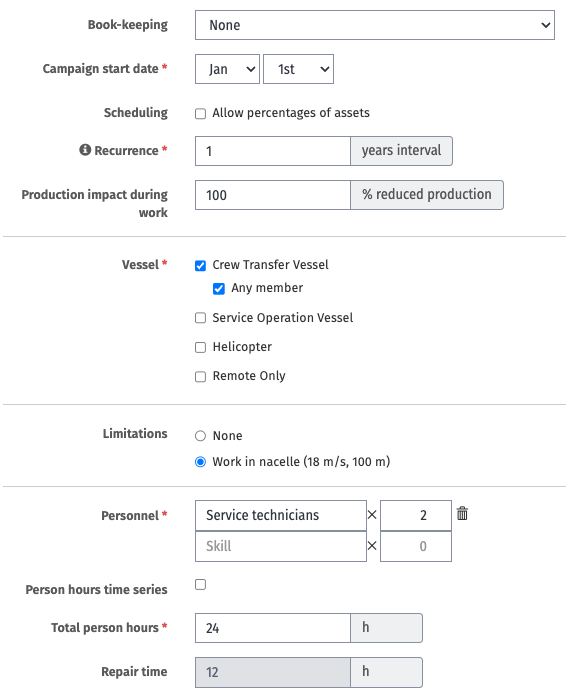
- Name:
- Click Save.
- Click on the Corrective maintenance tab.
- Create a task with the following details:
- Title:
Minor corrective - Severity:
Critical- Critical failures produce downtime from the moment of failure; non-critical failures do not (but do during maintenance work).
- Lifetime distribution:
Exponential- Our failure modelling page contains more details on this aspect of Design O&M.
- Annual failure rate:
1 - Personnel:
Service technicianx2 - Total person hours:
12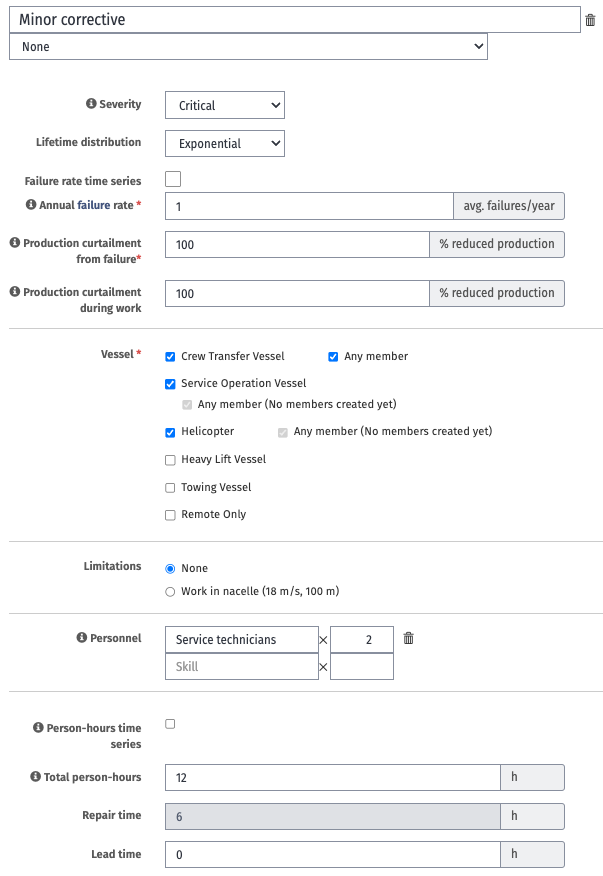
- Title:
- Click Add Corrective Maintenance task.
- Create an MCR task with the following settings:
- Title:
MCR - Severity:
Critical - Lifetime distribution:
Exponential - Annual failure rate:
0.1 - Production curtailment during work:
100 - Vessel: Check
Heavy Lift Vessel. - Allow scheduled work while waiting: Check.
- Limitations: Check
None. - Used capacity:
1 - Maximum delay at base:
1 - Inspection person-hours:
16 - Inspection crew size:
2 - Preparation person-hours:
16 - Preparation crew size:
2 - Replacement person-hours:
80 - Replacement crew size:
4 - Finalization person-hours: 16
- Finalization crew size:
2 - Lead time:
80
- Title:
- Click on the Weather tab.
- Select a weather square for the asset and click Use ERA5 data. This data should appear to the left.
Step 5: Add your logistics
In order to carry out the MCR tasks, we need to add an HLV and a crew transfer vessel (CTV), and for the daily operations, we need an SOV.
Add an HLV
- Click on Logistics.
- Click Add.
- Choose an HLV.
- Set the Port to
Esbjerg. - Click Next.
- Again, we have the option to set the vessel parameters. Under the Processes tab, we’ll use the following settings:
- 1.0 Mobilisation:
- Duration:
10hours
- Duration:
- 2.0 Loadout:
- Loadout:
5hours
- Loadout:
- 3.0 Transit to wind farm:
- Speed:
10kn
- Speed:
- 4.0 Jack up:
- Duration:
30mins
- Duration:
- 7.0 Transit to next asset:
- Speed:
10kn
- Speed:
- 8.0 Transit to port:
- Speed:
20kn
- Speed:
- 9.0 - Demobilization:
- Duration:
10hours
- Duration:
- 1.0 Mobilisation:
- Click on the Capacity tab:
- Set Maximum capacity to
2. - Set Minimum required capacity to
1.
- Set Maximum capacity to
- Click Add.
Add a CTV
- Click on Logistics.
- Click Add.
- Choose a CTV.
- Set the Port to
Esbjerg. - Click Next.
- Click on the Activity Durations tab.
- Enter the following values:
- Connection time:
10m - Disconnection time:
5m - Personnel transfer time per technician:
5m - Equipment transfer time:
10m - Mobilising time per port visit:
30m - Demobilising time per port visit:
15m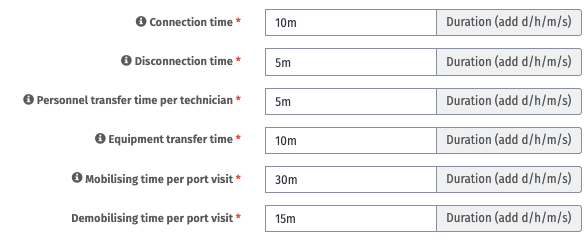
- Connection time:
- Click Add.
Add an SOV
- Click on Logistics.
- Click Add.
- Choose an SOV.
- For the Off duty location, choose a point in Esbjerg port using Place in map.
- Set the Port to
Esbjerg. - Click Next.
- Click on the Capacity tab.
- For Technician capacity, enter
40. - Click on the Performance tab:
- Cruising speed:
12 - Dynamic positioning transit speed:
5 - Dynamic positioning activation time:
30m
- Cruising speed:
- Click on the Weather criteria tab:
- Significant wave heigh access limit:
2.8 - Wind speed access limit:
14 - Wind speed limitation reference height:
100
- Significant wave heigh access limit:
- Click on Activity durations tab:
- Time between going to port:
14d - Connection time:
10m - Disconnection time:
5m - Personnel transfer time per technician:
2m - Equipment transfer time:
10m - Mobilising time per port visit:
12h - Demobilising time per port visit:
12h
- Time between going to port:
- Click Add.
Step 6: Add personnel
Finally, we need personnel to carry out the maintenance tasks. In step 3, we specified that we need Service technicians to carry out the tasks, so we’ll create those now.
- Click on the Personnel tab.
- Click Add.
- Enter the following:
- Group title:
Service technicians - Group type:
Full time employees - Members:
12 - Home base:
Service operation vessel 1 - Skills: Check
Service technician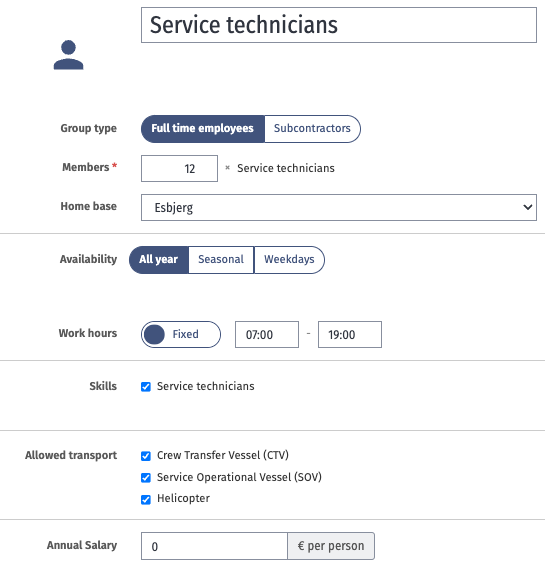
- Group title:
- Click Save.
Step 7: Configure your strategy
Before running the simulation, we first need to complete some required parameters in the Strategy tab. Set the Emergency response limit to 45 and the Minimum working length to 1.
Emergency response limit defines the travel time the personnel transfer vessel can travel from the drop off site.
Minimum working length sets the minimum amount of working time that is required before personnel are transferred to the site. This ensures that personnel are not transferred for individual, small corrective tasks.
If your case has any tasks that require less than 1 hour, the task will not be carried out. The simulation will still complete, but the affected tasks will never be completed.

Check Bundle work orders on assets (use the same team to carry out a set of work orders) and Redeploy personnel (this allows reuse of technicians offshore).
Step 8: Run a simulation
With our assets, logistics, personnel, and strategy configured, we’re now ready to run our simulation.
- Go to the Simulate tab.
- Choose
Increment start yearWeather. - For the Start year, enter
2024. - Set the simulation run to
5years. - Choose
10Runs.
- Click Run simulation.
You should have ten green runs, and your output summary should look like the screenshot below. If not, return to steps 3–7 and make sure you entered the inputs correctly. If your problem persists, contact support.
