Creating a contract
This feature will allows users to create, customise, and manage technician contracts.
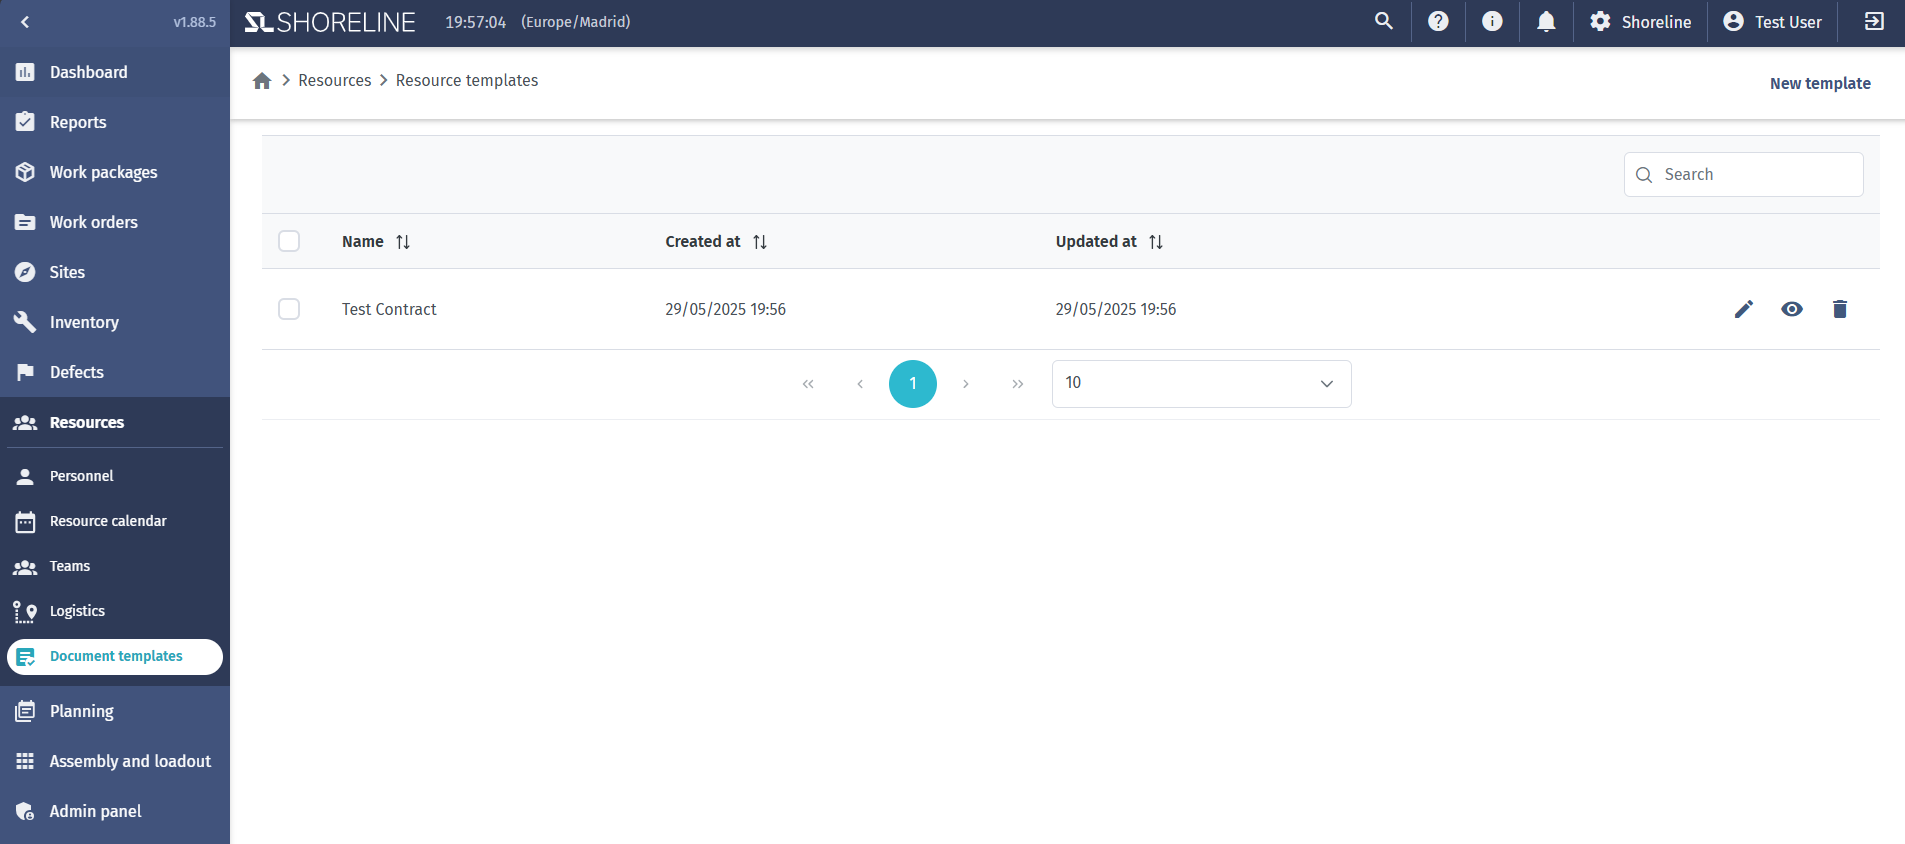
Steps to create a template
-
Navigate to Resources > Document templates in the left-hand menu.
-
Click New template at the top right of the screen.
-
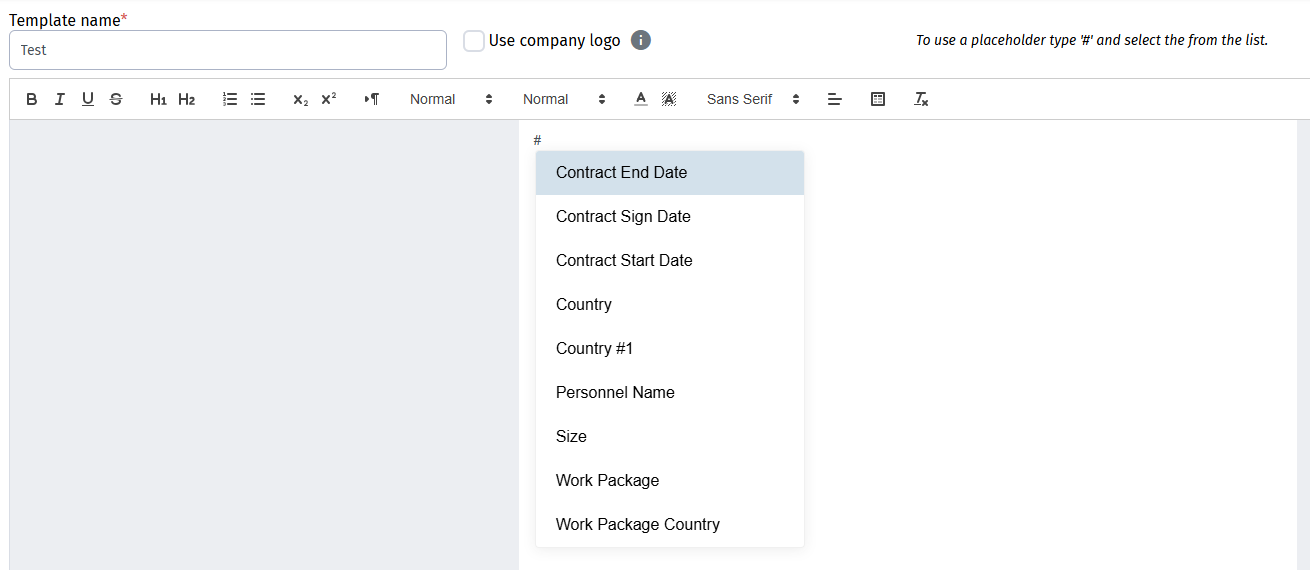
Give your template a name, and fill in the contract information. If you have added your company logo in the account settings, checking the box "Use company logo" will add it the the contract output. Variables can be added by typing the "#" character and then selected from the pulldown list:
-
Insert a table by hovering over the icon below and selecting the size. Table sizes will always be created to fit the page width, so the size cannot be modified:

-
Clicking on the "Preview" button will open a popup that shows what the contract will look like. You can also see the version of the contract.
-
Click Save.
Steps to create a contract
-
Navigate to Resources > Personnel in the left-hand menu.

-
Select the employee or employees that you would like to create a contract for and select "Create contract" at the top right of the screen.
-
Enter the name of the contract, as well as the dates, work packages, and country:

-
Click on the Create button at the bottom right.
-
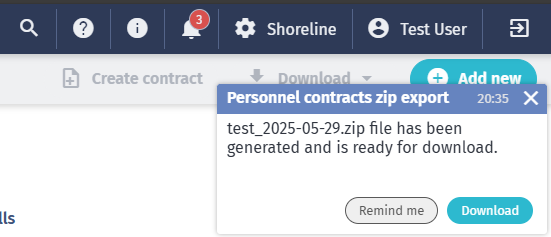
You will then have the option to download the contract:
Viewing a persons contracts
-
Navigate to Resources > Personnel in the left-hand menu.
-
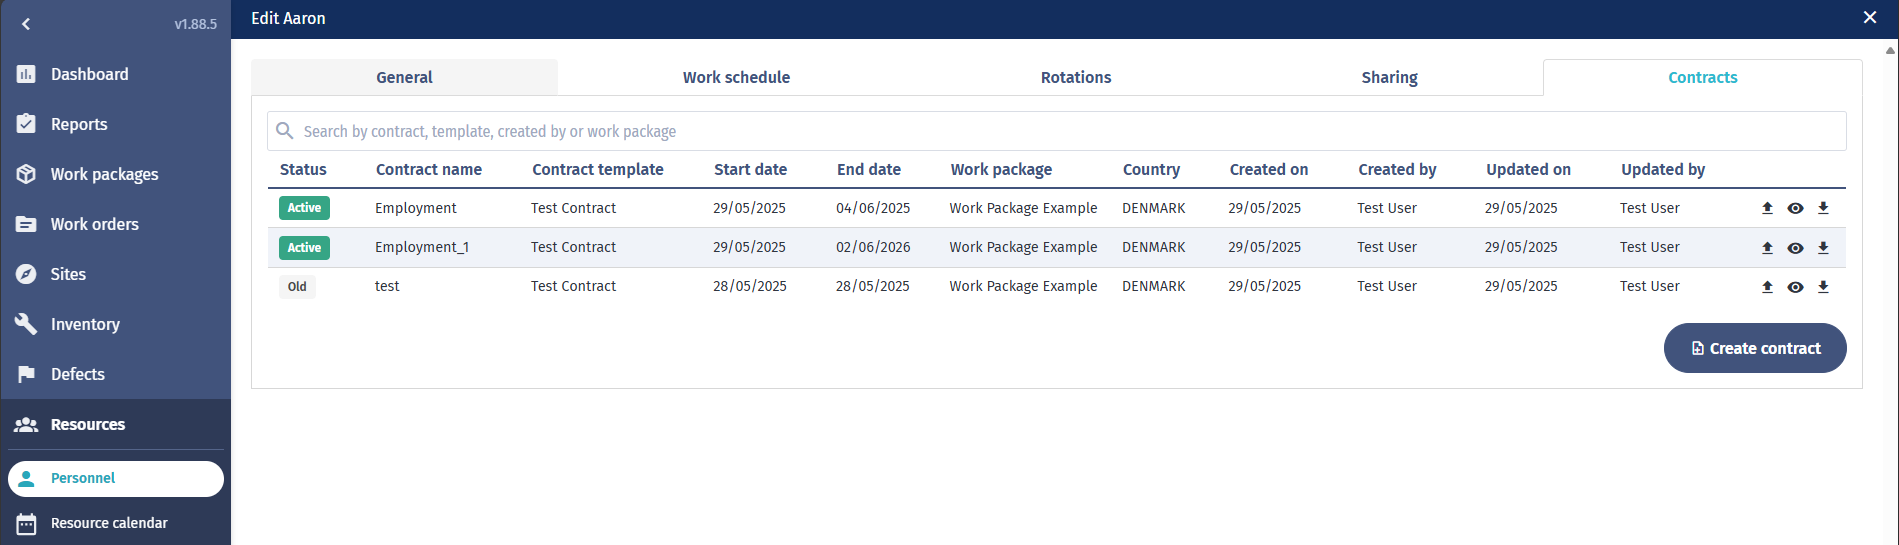
Open the user profile and navigate the the "Contracts" tab:
-
This view will show you information for each contract that is applied to this user. You can see the current status, dates, etc. and also have the ability to download the selected contract.