How to use the Execution Field Services App
Learn how to use key in-app features. After you register time in the app, you can use the Execution web app to add those activities to a timesheet and submit them for approval.
Schedule
After creating activities and registering time against them, you can add activities to a timesheet and submit them for approval.
Register Time on an Activity
Register time on an existing activity for yourself (default) and on behalf of others assigned to the activity.
- From the Schedule screen, swipe left on an activity to open the Register Time screen.
- There are two ways to register time:
- Enter a start and end date and time.
- Enter the Time Spent (it will be registered from the selected Start Date and Time).
- To register time on behalf of others, tap Register Time For and select employees (requires additional permissions).
- Tap Register.

Register time through the web app.
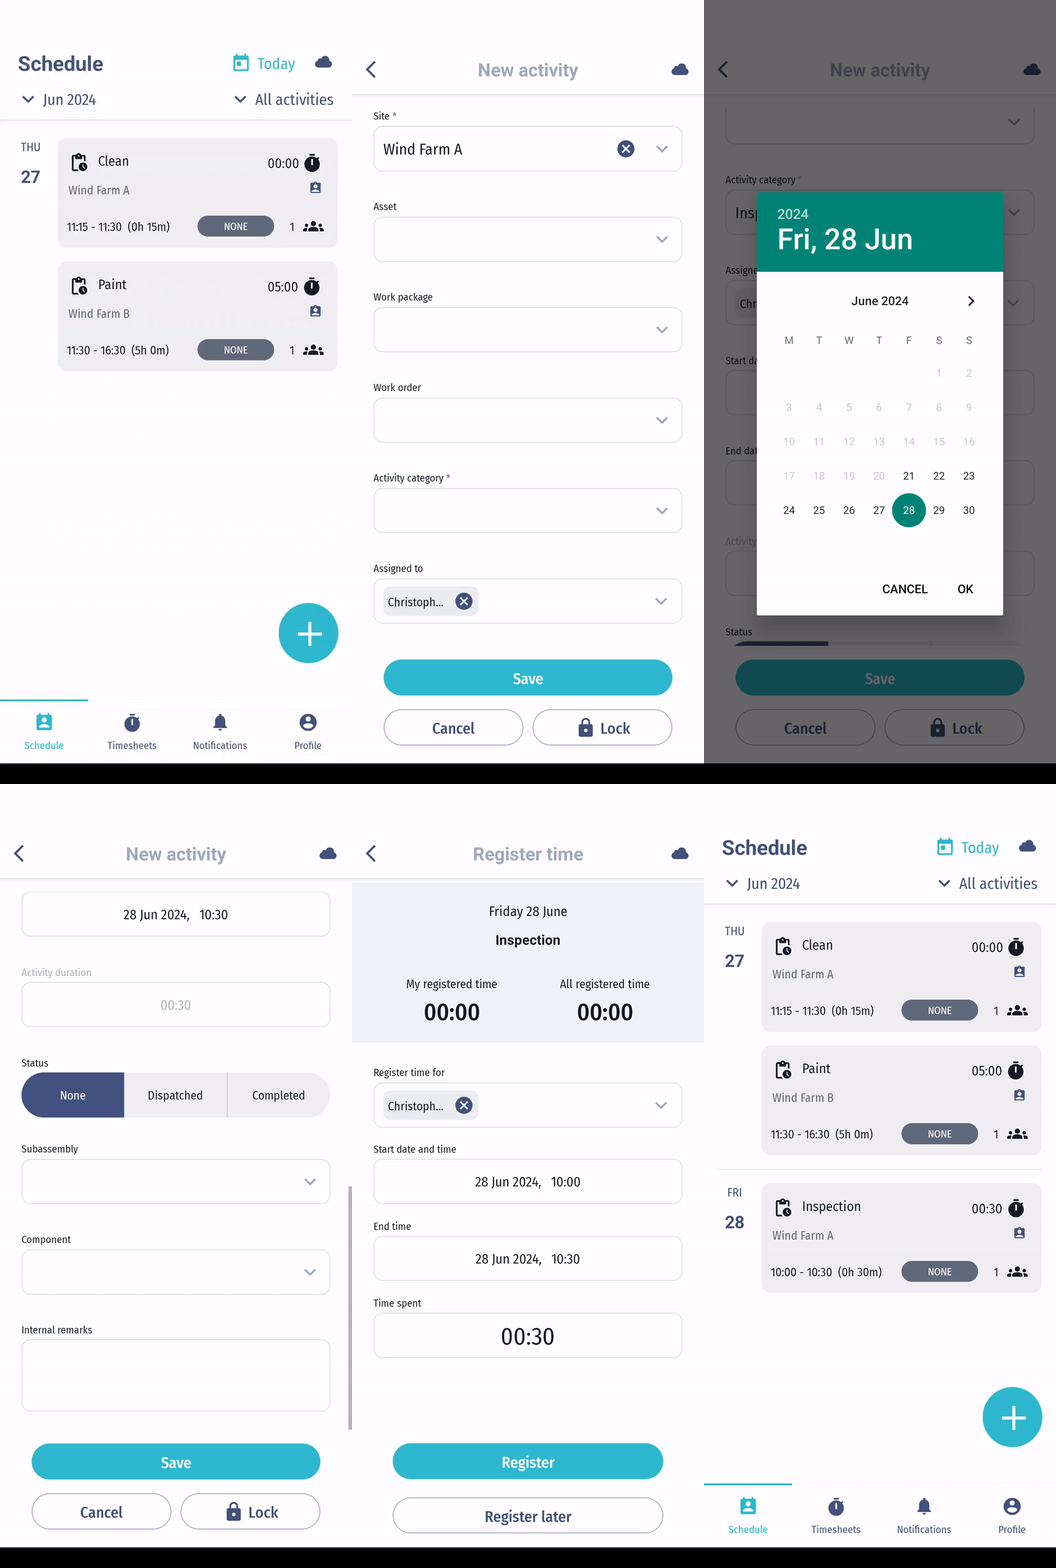
Create a New Activity
Creating a new activity involves:
- Defining the activity and assigning users.
- Registering time for the assigned personnel.
- From the Schedule screen, tap the blue + icon.
- Tap Register New Activity.
- Complete the required fields (e.g., Site, Activity Category, Start and End Date/Time, Internal Remarks).
- Complete any optional fields you require (e.g., Asset, Work Package, Work Order, Tasks, Assigned To, Status, etc.).
- Tap Save.
- From the time registration screen, either:
- Register time immediately.
- Tap Register Later (if enabled on your account).
- On the activity overview screen, tap Edit Activity to make changes or Close to return to your schedule.

Register new activities through the web app.
View and Edit Activities and Time Registrations
Editing an activity does not affect previously registered time. You must edit time registrations separately.
- Tap an activity in Schedule to view details.
- You can:
- Edit the Activity: Tap Edit Activity, make changes, and tap Save.
- Edit Time Registration: Tap a time entry, edit as needed, and tap Save.
- Delete a Time Registration: Swipe right on the entry.
Lock and Unlock Activities
Locking an activity prevents further edits or time registrations.
- From the Schedule screen, tap the relevant activity.
- Tap Edit Activity.
- Tap Lock/Unlock.
- Confirm your choice and tap Save.
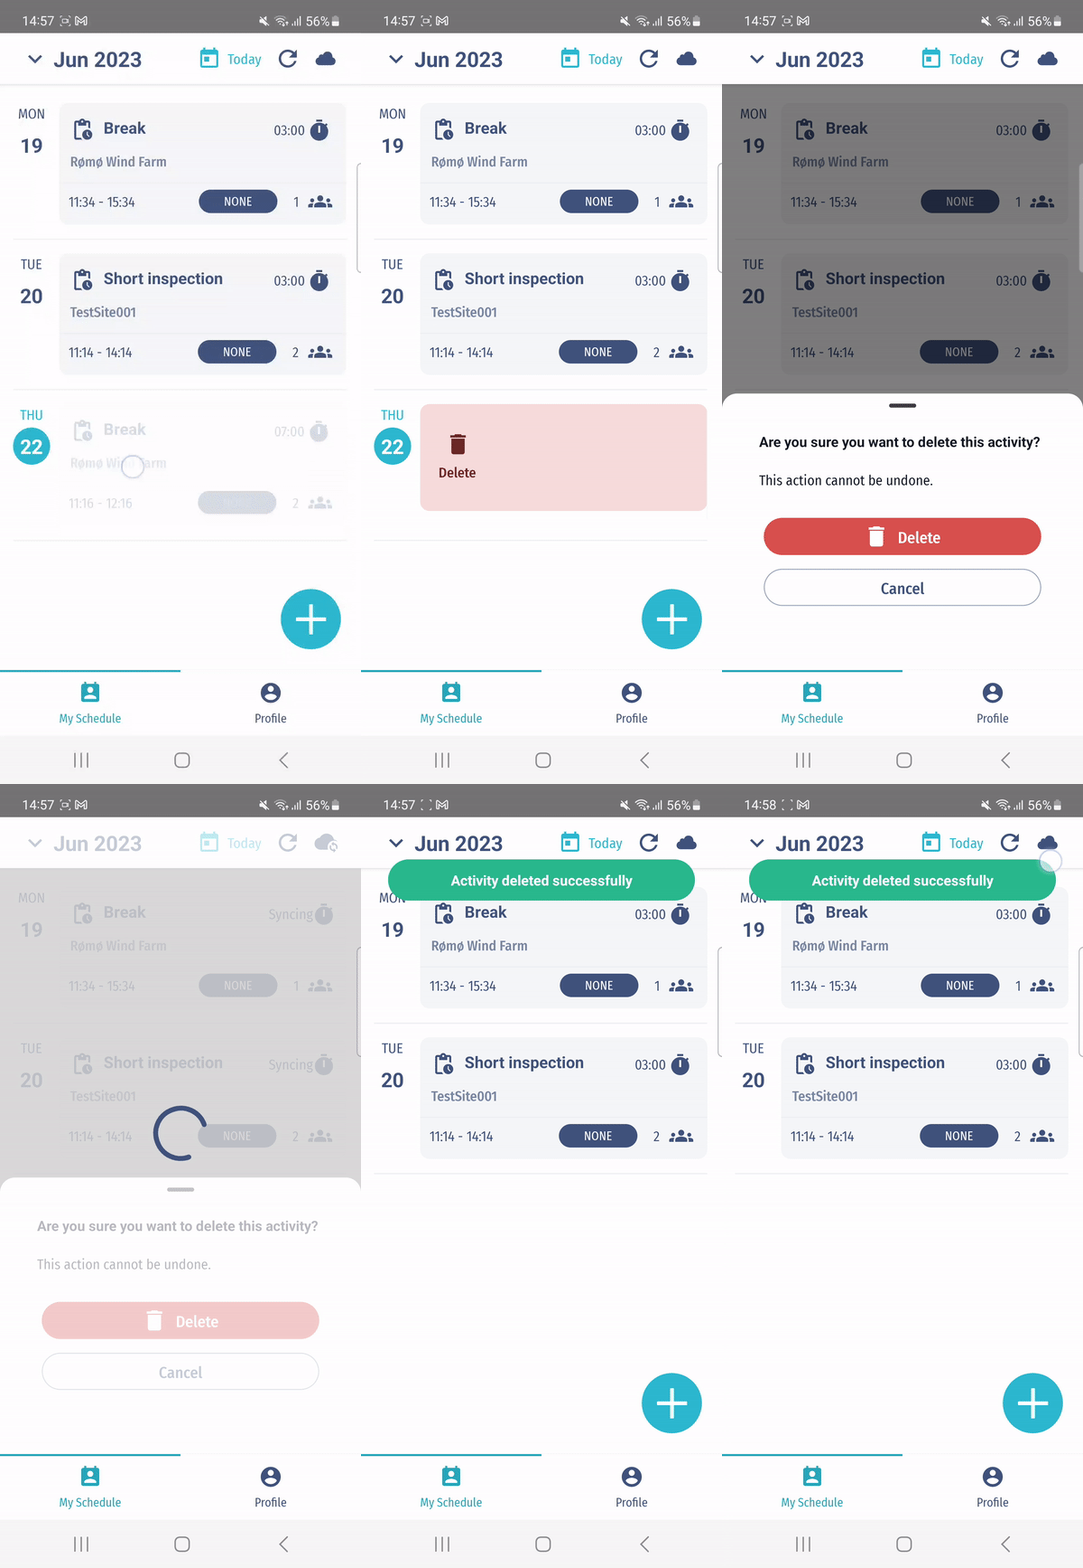
Delete Activities
Note: Deletion is permanent and requires delete permissions.
- From the Schedule screen, swipe right on the activity.
- Tap Delete to confirm.

Change the Date on Your Schedule
- On the Schedule screen, tap the month and year at the top left.
- Select a date from the calendar.
- To reset, tap the Today icon at the top right.
Timesheets
After registering time against activities, you can add those records to a timesheet and submit it for approval.
Create and Submit a Timesheet
- From the Timesheets screen, tap the blue + icon.
- Tap Add a New Timesheet.
- Complete the required fields (e.g., Name, Start/End Date, Submit Timesheet For).
- (Optional) Select a Work Package.
- Tap Continue.
- Review the registered time entries:
- Edit or delete entries as needed.
- Re-add deleted entries if required.
- Tap Send (for approval) or Save (as a draft).
Add time registration to a timesheet in the web app.
View, Edit, and Lock/Unlock Timesheets
Locking a timesheet prevents further edits.
- Tap a timesheet to view details.
- You can:
- Edit the Timesheet: Modify details, add/remove time entries, and save.
- Lock/Unlock the Timesheet: Tap Lock/Unlock and confirm.
- Cancel to exit without changes.
Delete a Timesheet
Note: Deletion is permanent and requires delete permissions.
- From the Timesheets screen, swipe right on the timesheet.
- Tap Delete to confirm.
Notifications
- Swipe right to mark notifications as read/unread.
- Bulk mark as read: Settings > Mark All as Read.
- Swipe left to clear notifications.
- Tap a notification to open the relevant timesheet.
Profile
Switch Workspace
Note: Requires internet connectivity.
- Tap My Profile.
- Tap Switch Workspace.
- Enter the workspace name and tap Continue.
- Enter account credentials and tap Login.
This guide provides an overview of key Execution Field Services App functionalities, including scheduling activities, managing timesheets, and handling user profiles.