Account Settings Overview
In the Account settings section, you can manually add the following information: General, Permissions, Adverse events, Work orders, Activity categories, Sites/Assets, Logistics, and Personnel. More information on each section below:
General
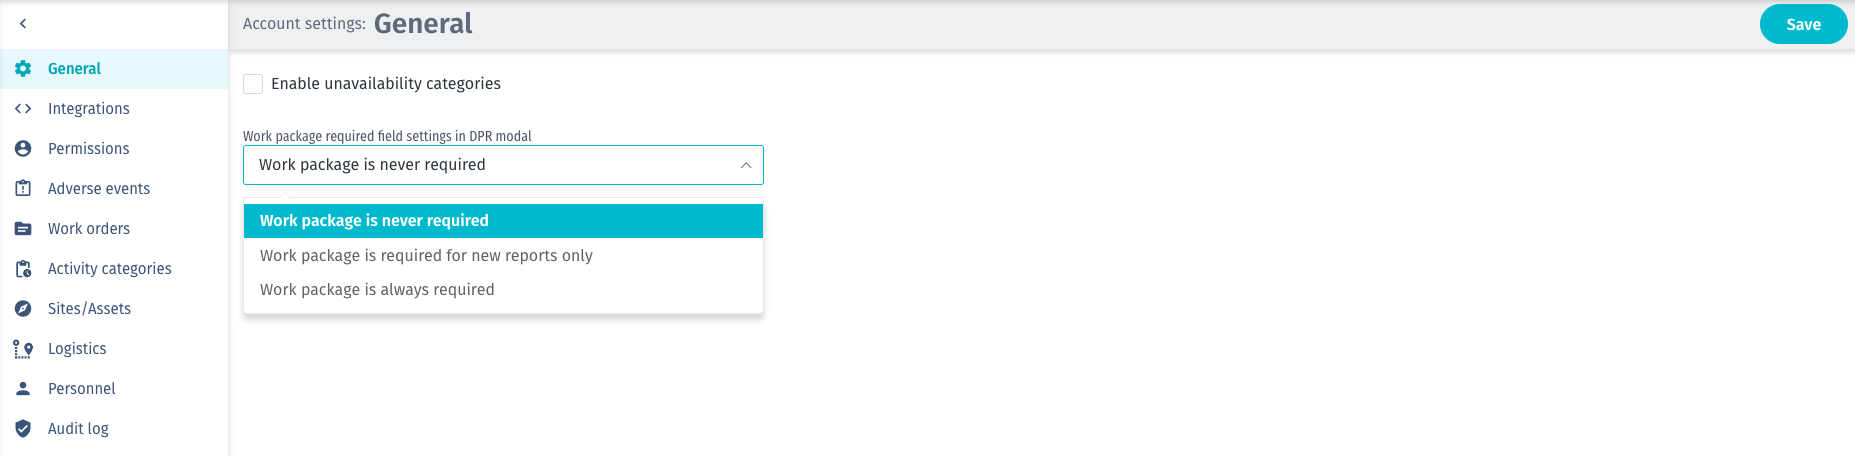
In the 'general section', you are able to set the time zone where this project takes place and select if the work package field is required in the DPR modal. You can decide between three options: is never required, is required for new reports only, is always required.
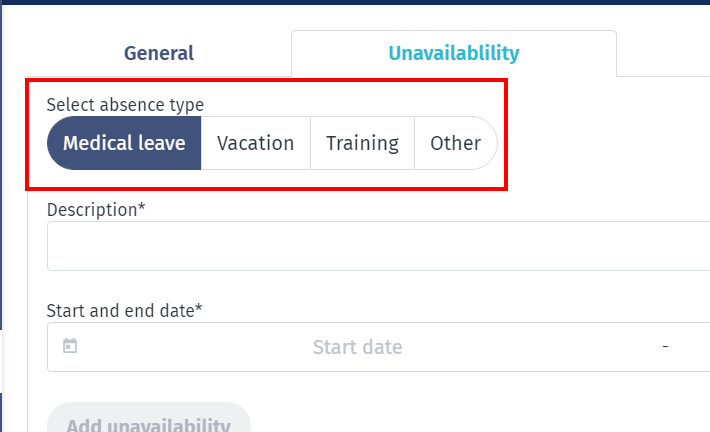
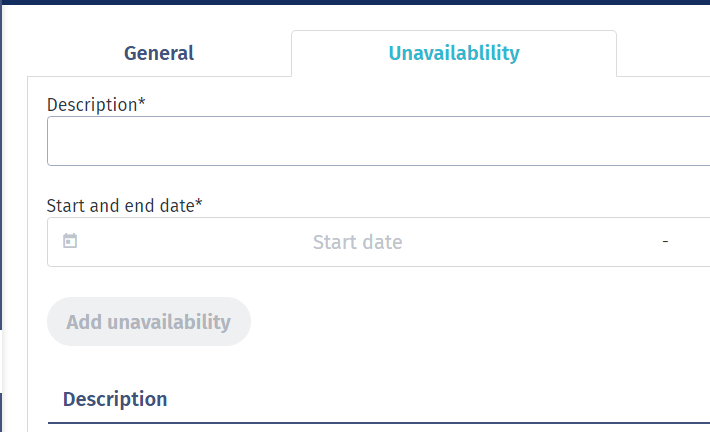
The 'Enable unavailability categories' lets you set an absence type when creating an unavailability on a user - if this is disabled, the categories will not be visible.
Screenshot of enabled unavailability categories when editing personnel:
Screenshot of disabled unavailability categories when editing personnel:
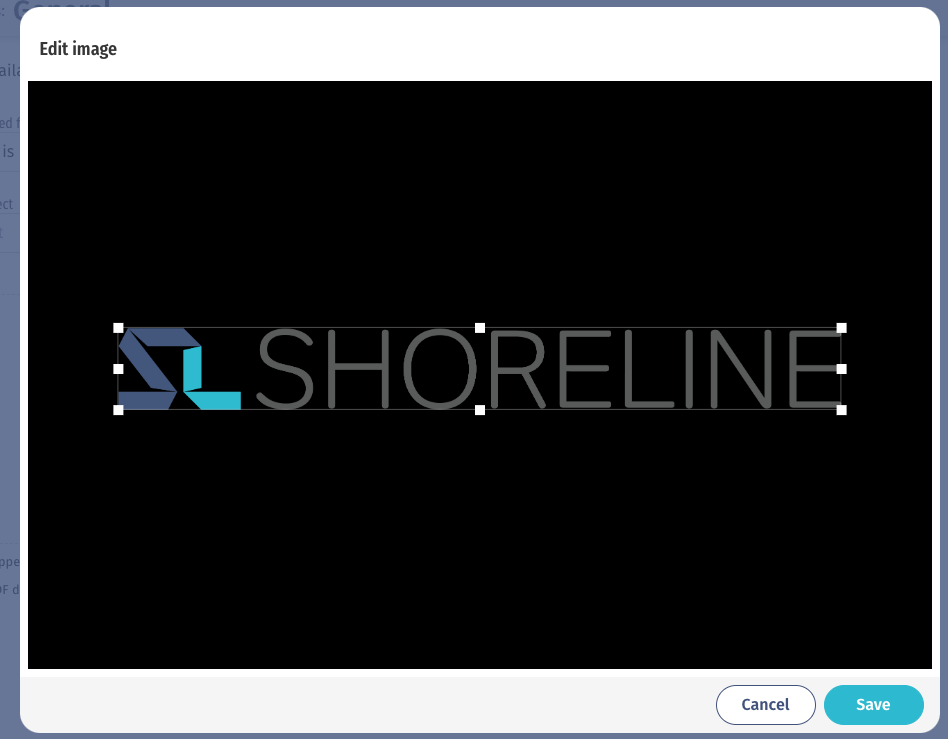
Add a company logo
You can add a company logo from the General section of your account settings.
Drop a file or click and browse to locate it. You then have the option to crop the image.
The company logo will appear on personnel CV and work order PDF downloads.
Check Use uploaded logo for page branding to enable the logo to appear throughout the Execution web app in place of the default Shoreline logo.
Integrations
You can integrate with different parties for weather forecasts, personnel rotations and certificates, and vessel tracking data integration.
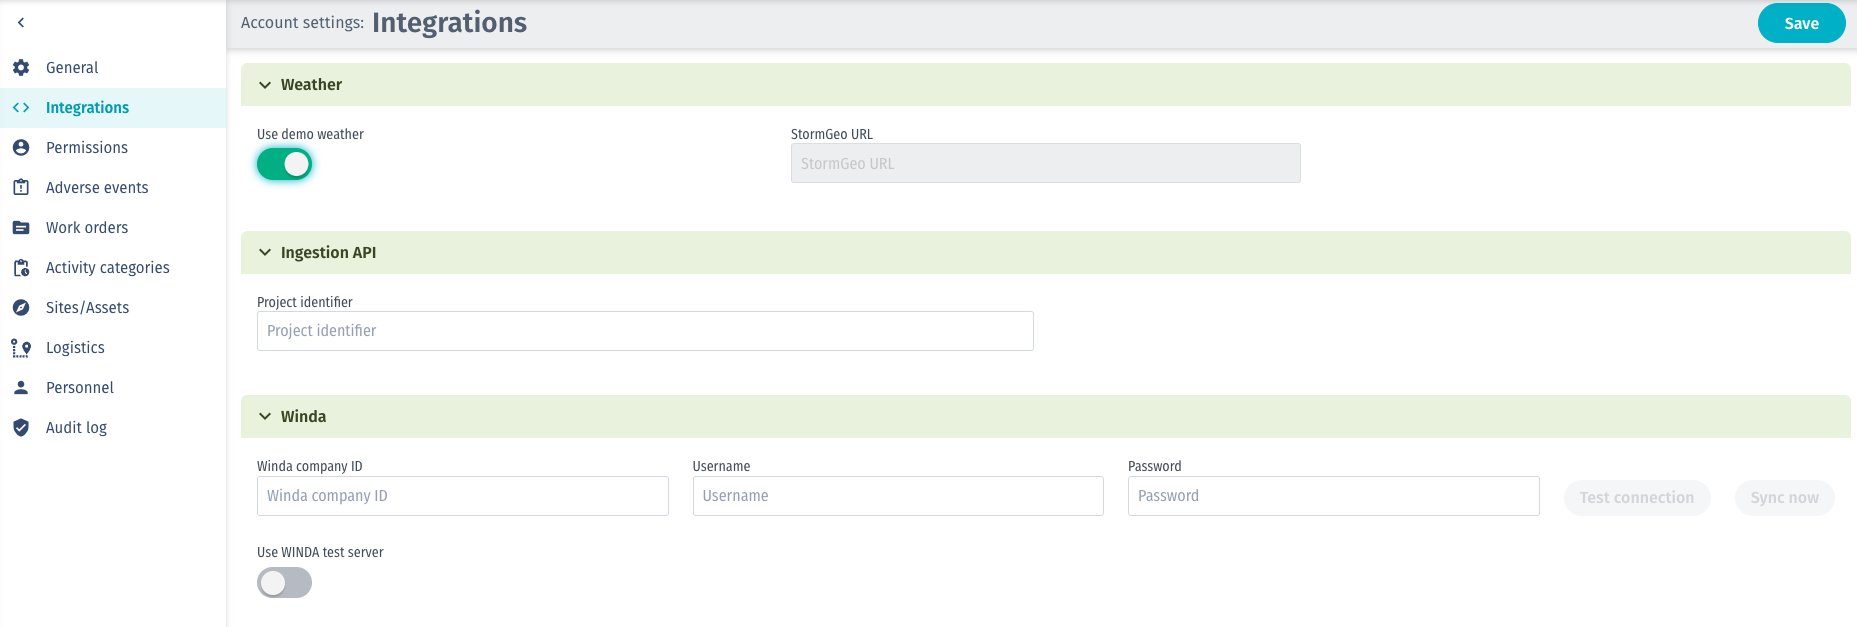
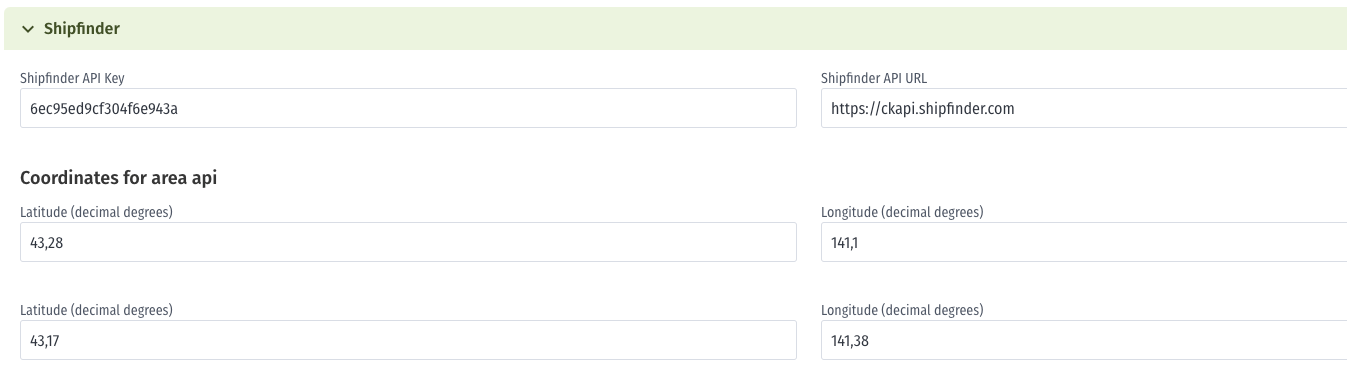
To have an active integration with Shipfinder, Shipfinder API Key needs to be filled in. Once Shipfinder API URL is used, that field cannot be saved empty.
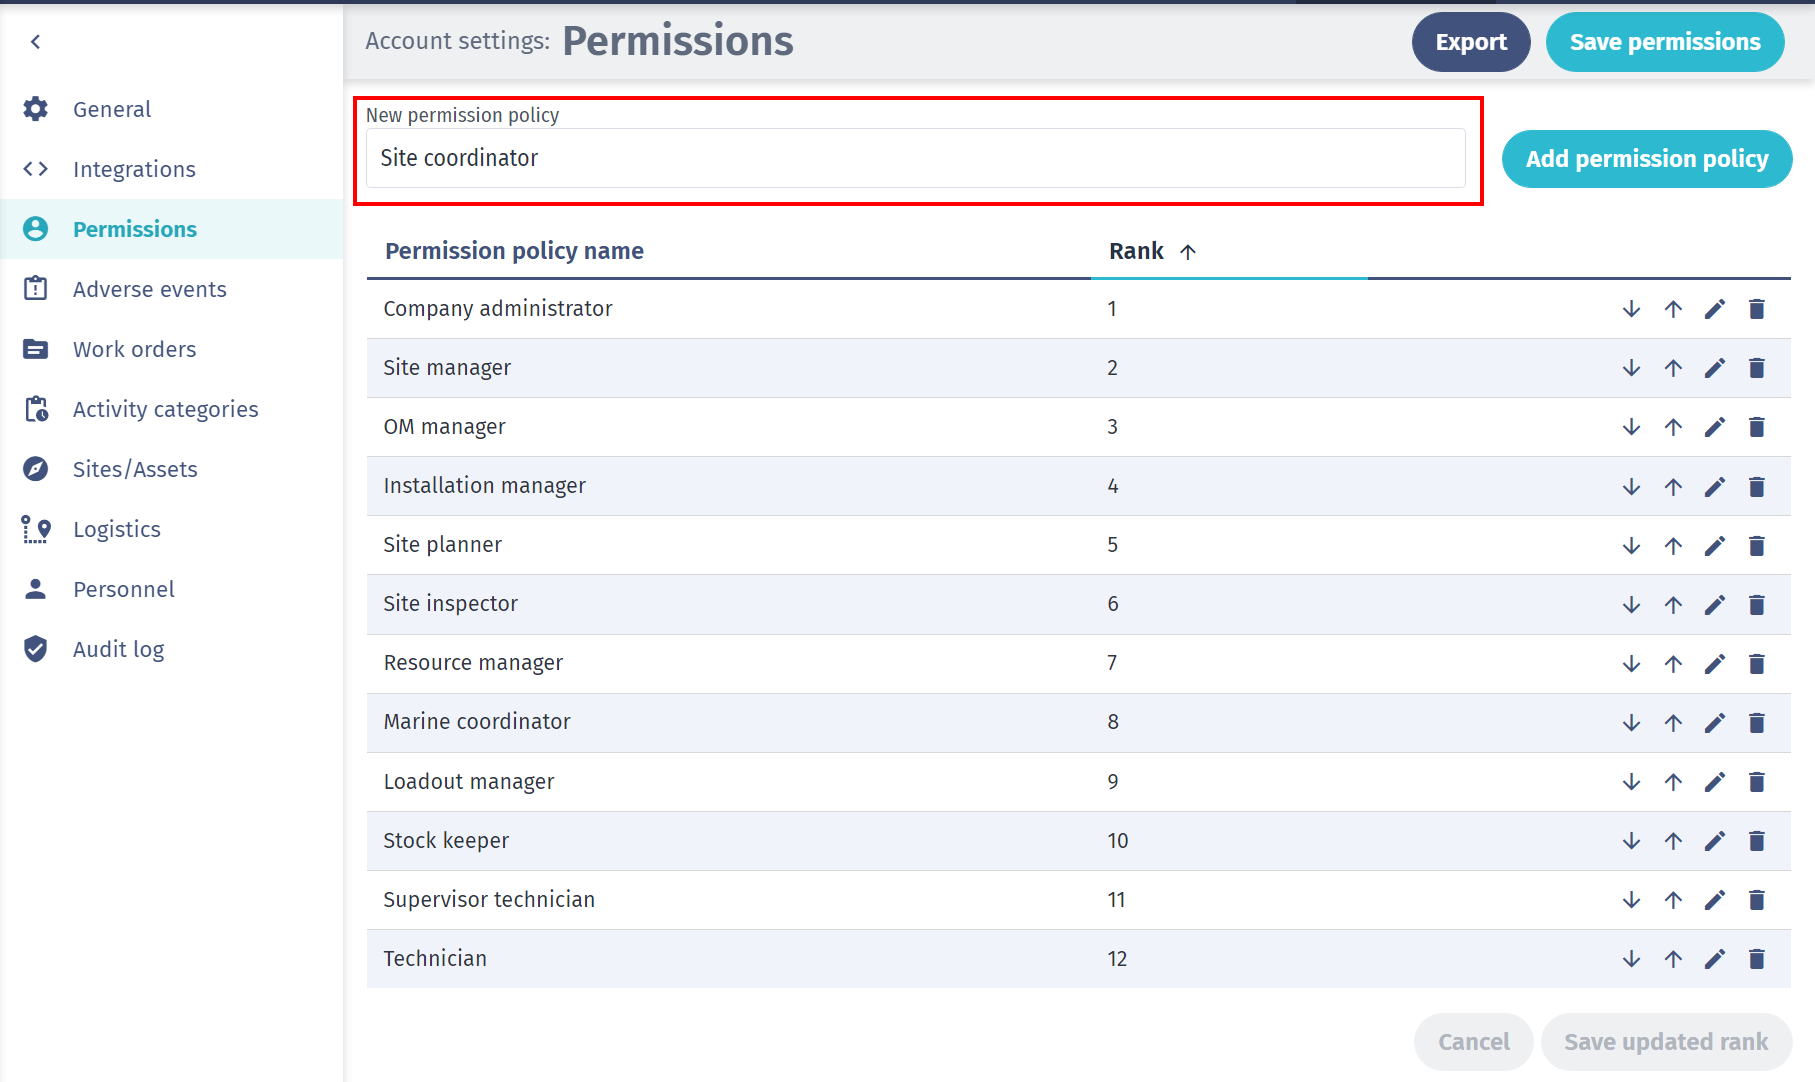
Permissions
Under the permissions, you will be able to add different access permissions. The first step is to type in ‘New permission policy’. Click ‘Add permission policy’, once added you will then be able to select what access each role will have by selecting or de-selecting permissions. You can always edit an existing permission policy by clicking on the 'pencil' icon or change their ranking position by clicking on the up or down arrow.
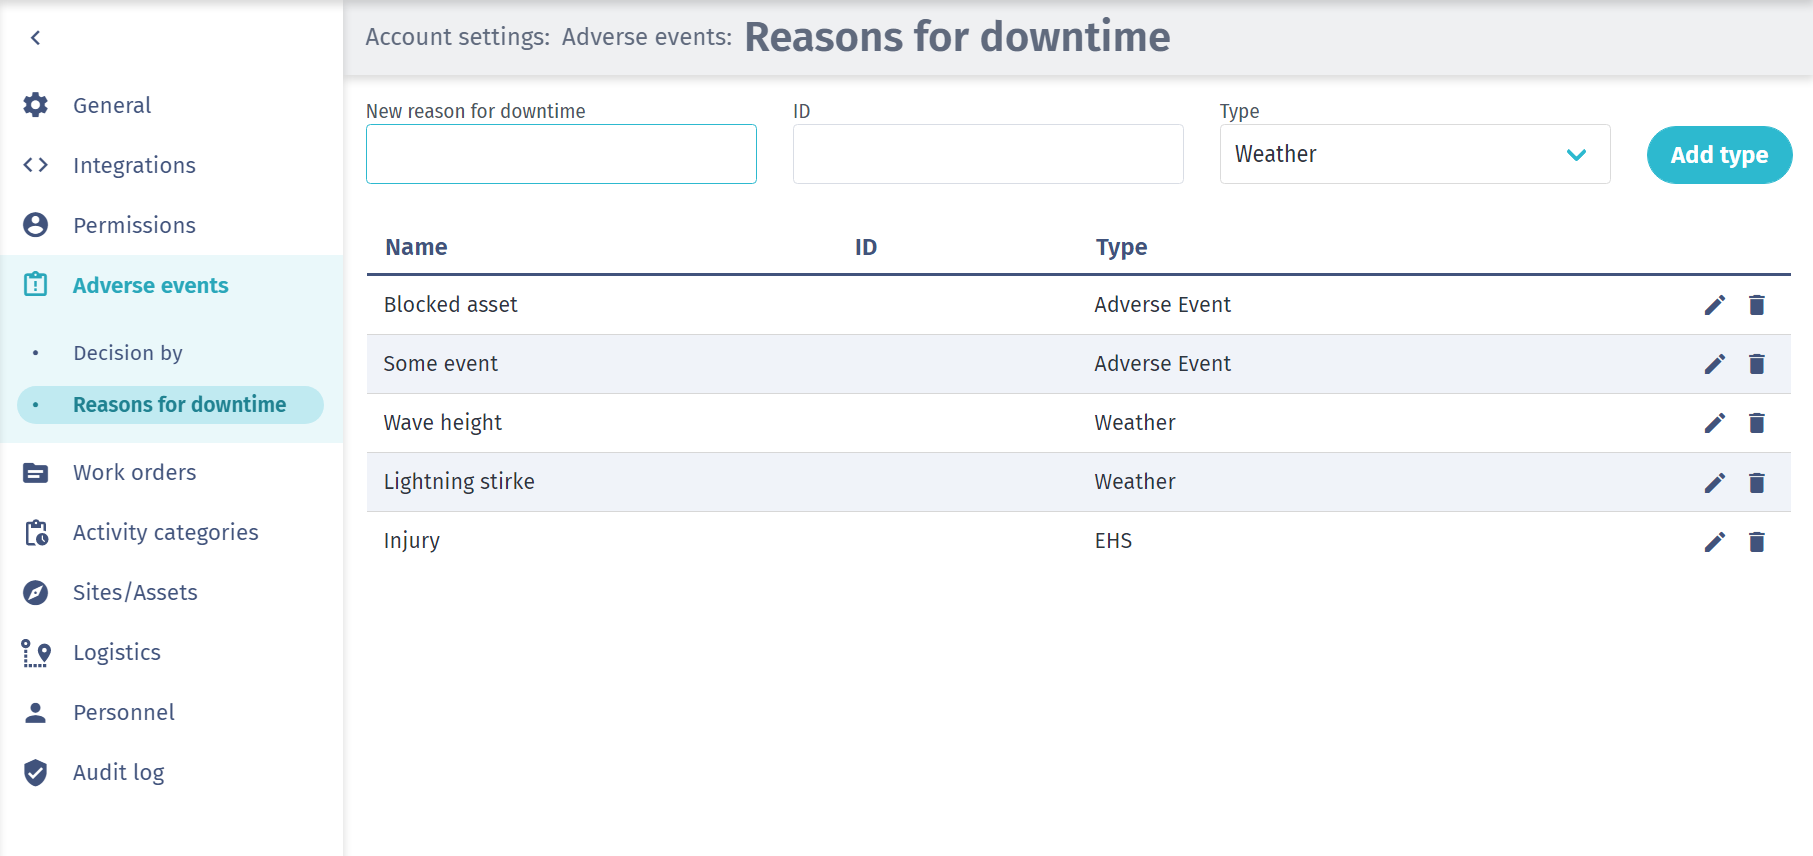
Adverse Events
In this section, you can add ‘Decision by’ and ‘Reasons for downtime’.

To add, type in a name for a new decision and click on 'Add type'. You can always delete by clicking on the trash can icon or edit by clicking on the ‘pencil’ icon.
If you click on the tab 'Reasons for Downtime' you will be able to add the reason, ID, and link it to 'Type'.
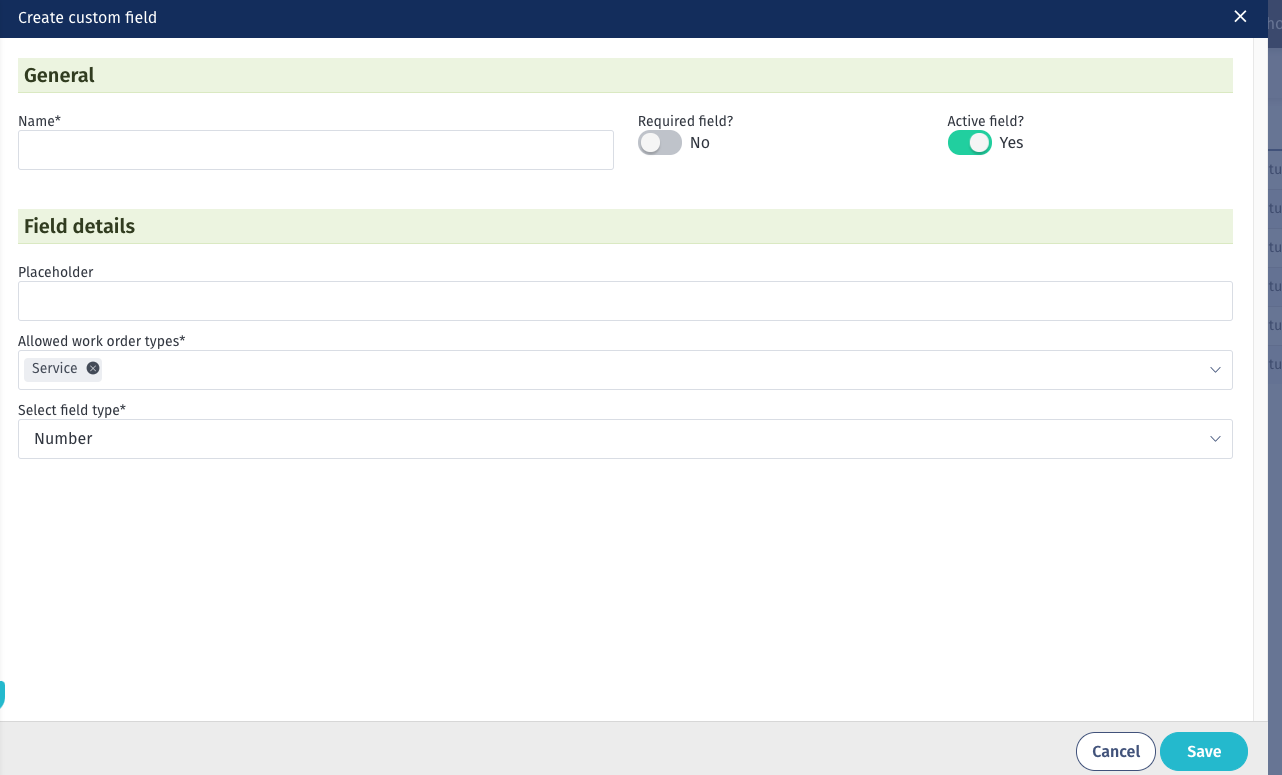
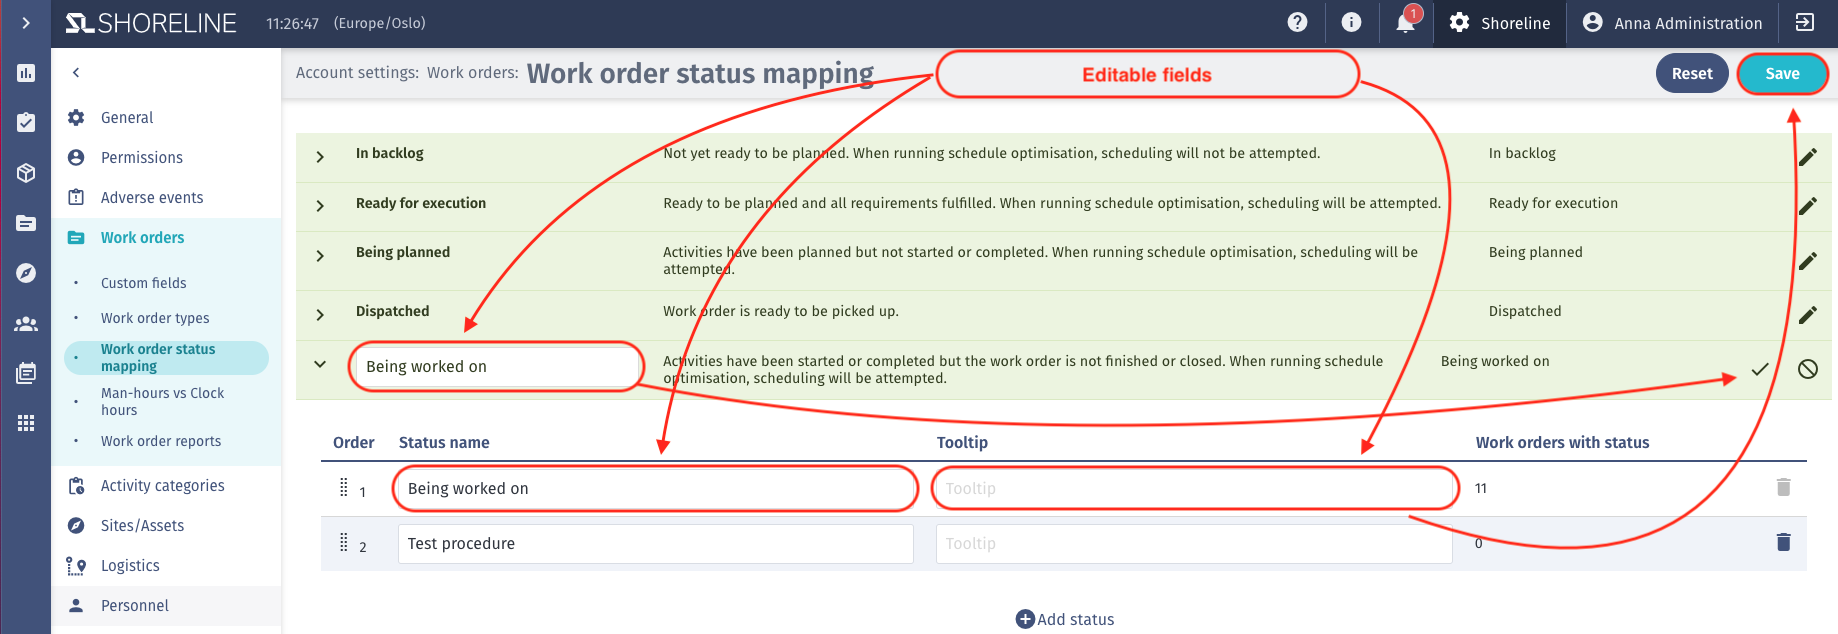
Work orders
In this section, you can set up custom fields, work order types, work order status mapping, man-hours vs clock hours, and work order reports.

The default view is the custom fields when accessing the work order settings. Here, you are able to create and edit custom fields.
Following the drop-down menu, you will be guided to work order status mapping, which is set up by default but can be customized.
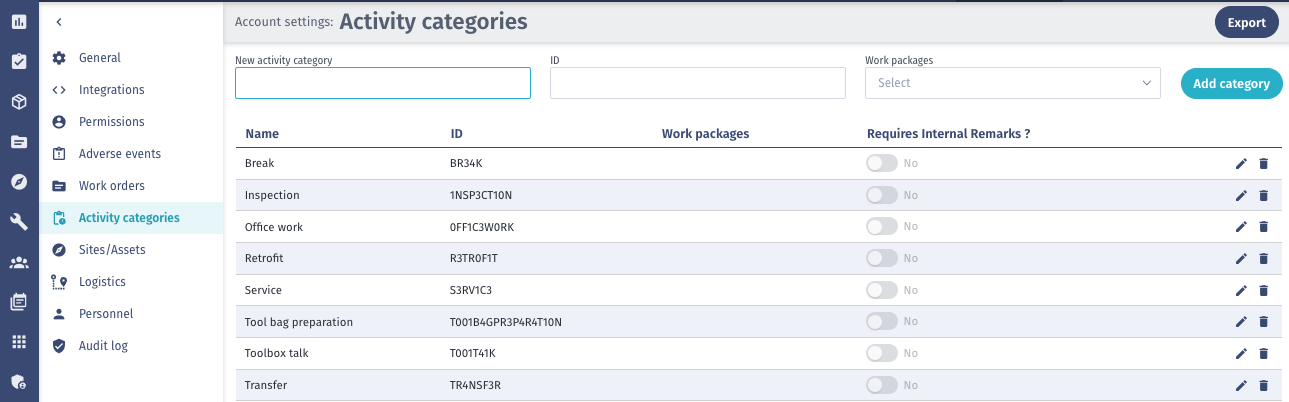
Activity Categories
Here you can add new or edit existing generic activity categories.
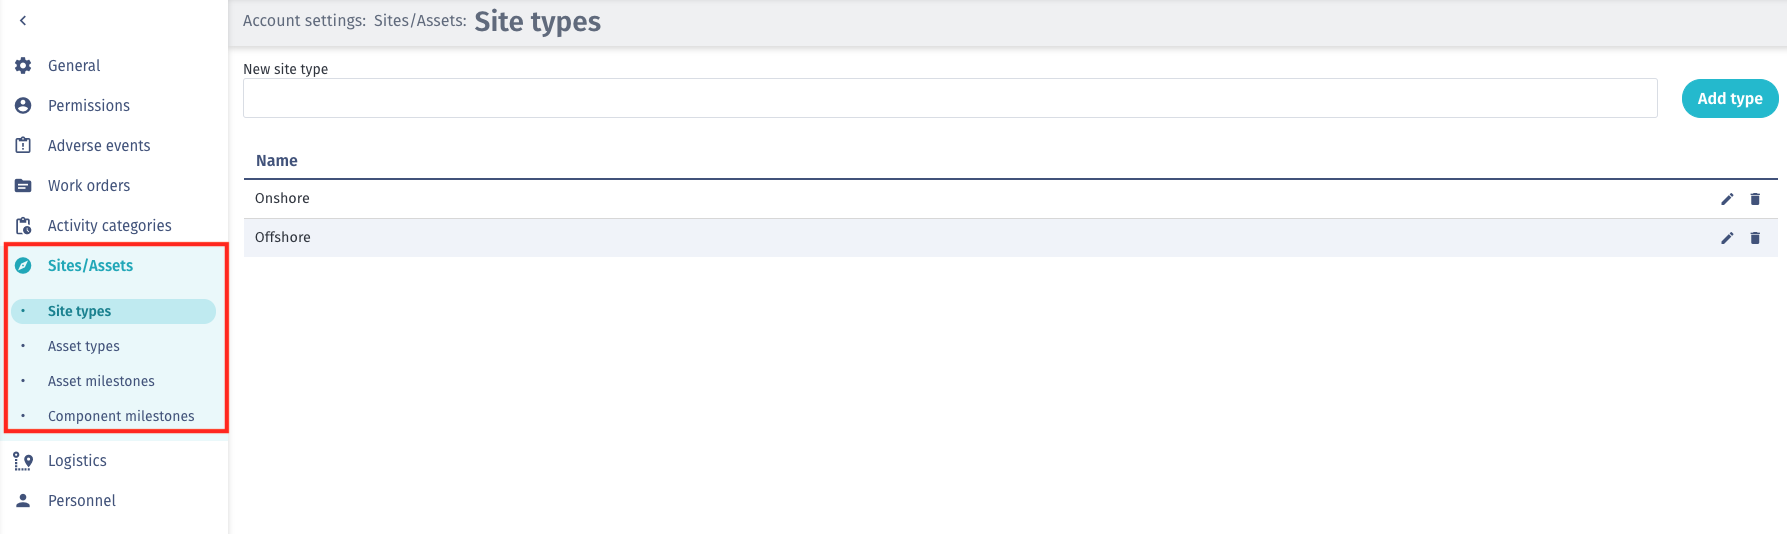
Sites/Assets
Under Sites/Assets, you can add the following settings: Site types, Asset types, Asset milestones, and Component milestones.
Logistics
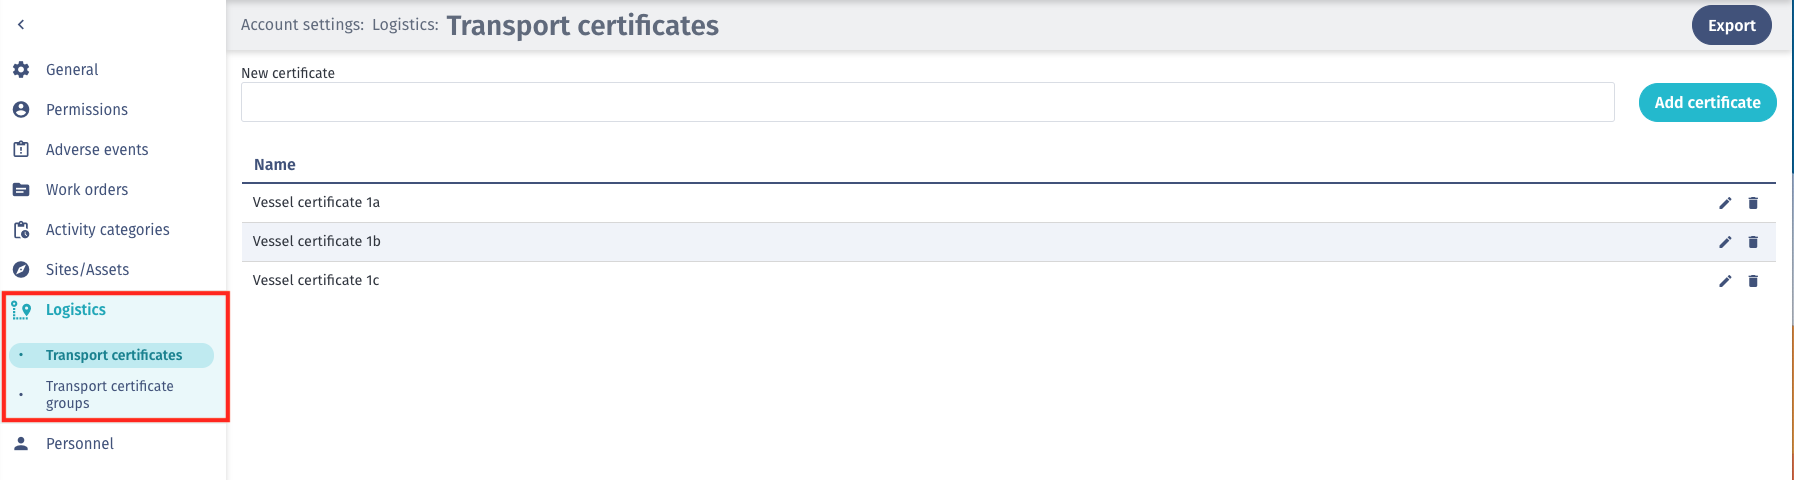
In the logistics tab, you can create the transport certificates and the transport certificate groups.
Personnel
This section is important for setting up personnel compensation, custom sections and fields, roles, departments, team types, and defining skills and skill groups.

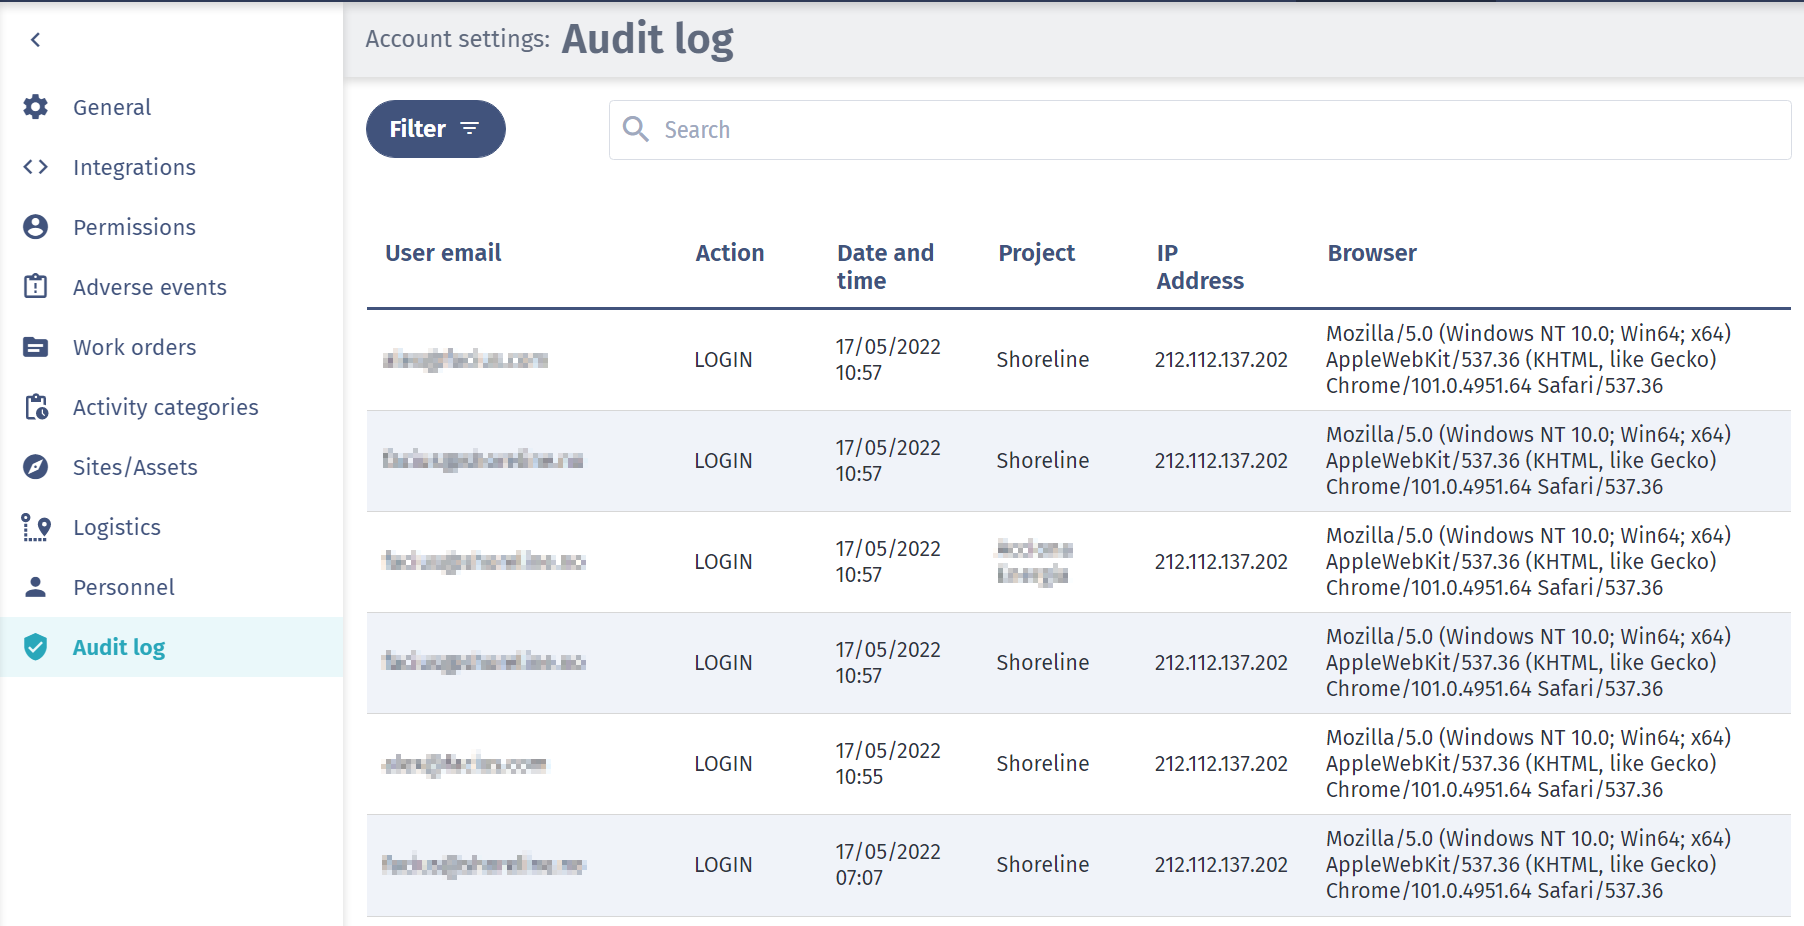
Audit log
In the Audit log, personnel with the permission can see the following information:
- User email
- Action taken
- Date and time
- Project name
- IP Address
- Browser information