Importing Subassemblies and Components
In order to import 'Subassemblies' or 'Components', you will need to be an administrator and have access to the Account Settings. You can find example files in the following article.
1. Open the Correct Page
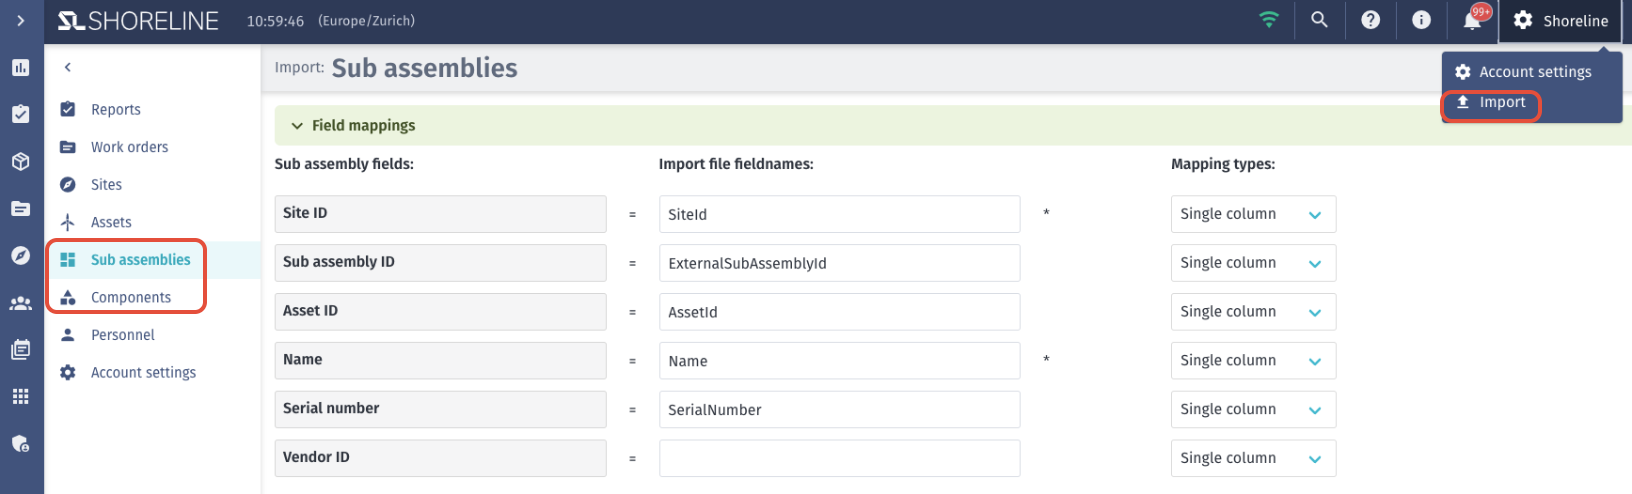
Go to 'Account settings' and select 'Import' and click 'Subassemblies'.
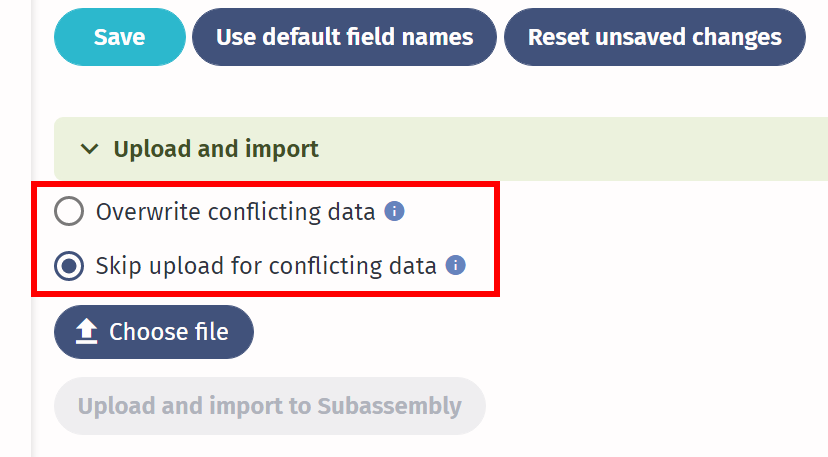
2. Overwrite or Skip Conflicting Data
Before you import, you will have to select whether to overwrite any conflicting data, or to skip the upload for conflicting data during the import.
- Overwrite: Imports with connected objects (components, subassemblies, assets, or sites), that conflict with system data will be imported and overwrite the system data. In case of conflicting connections between site, asset, and subassembly, the line will be skipped.
- Skip upload: Imports with connected objects (components, subassemblies, assets, or sites), that conflict with system data will be skipped.
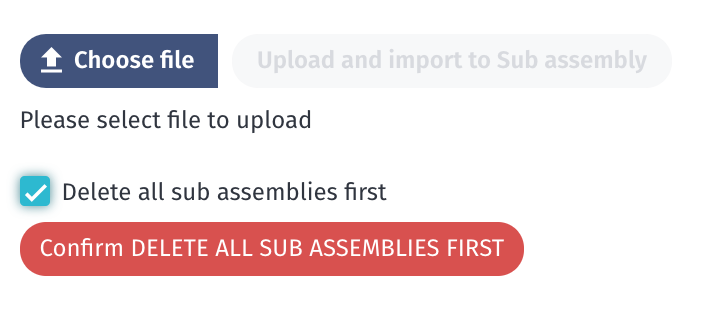
OPTIONAL 3. Delete Existing Subassemblies (If Necessary)
If you want to replace assets already existing in the system with the newly imported ones, you can delete them prior to the import. If you have no existing assets or do not want to delete the ones already in the system, skip this step and go to step 3.
To delete, collapse the 'field mappings' tab or scroll down to the bottom of the page to 'Upload and import'. Check the box for 'Delete all subassemblies first'. Then click on 'Confirm DELETE ALL SUB ASSEMBLIES FIRST'.
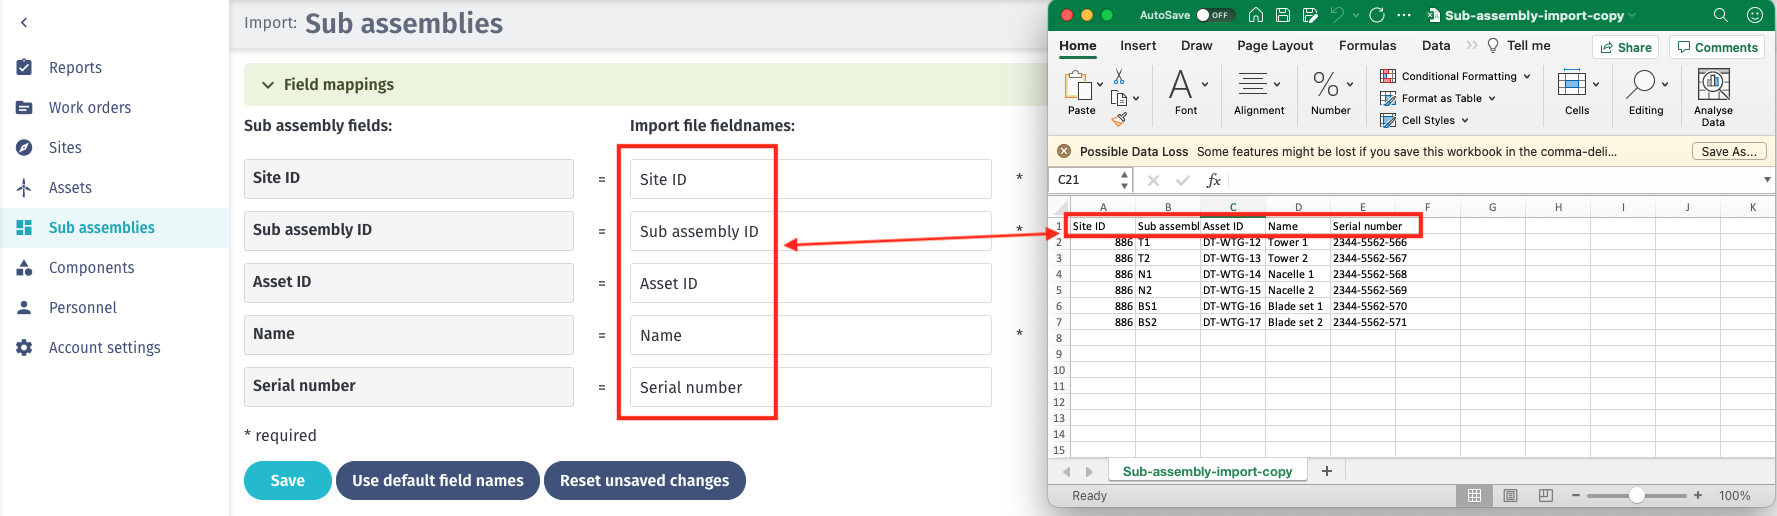
3. Define Fieldnames
Before selecting the import file, define the 'Import file fieldnames' which need to be aligned with your .csv file and click Save. Columns with a (*) are required in order to successfully import a file. Some fields have a '? icon' attached for further information regarding the setups. To obtain this information, hover over it with your mouse.
Furthermore, you need to define the mapping types between single column, multiple columns, and fixed value. You can find more information on how to use those different mapping types in this article.
Note: Before importing the .csv file, make sure that the imported data are aligned with the information in the tool, including Site ID, Asset ID, etc.
4. Import the File
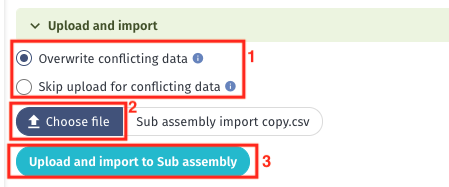
Before selecting the CSV import file, choose one of the two options to be considered when uploading:
- Overwrite conflicting data: Imports with connected objects (components, subassemblies, assets, or sites), that conflict with system data will be amended and imported using system data for the lower object in the hierarchy (components > subassemblies > assets > sites).
- Skip upload for conflicting data: Imports with connected objects (components, subassemblies, assets, or sites), that conflict with system data will be skipped.
For the import itself, choose the button Choose File at the bottom of the page, select the CSV import file, and click open. After the upload, the below-marked button becomes available, which confirms the import.
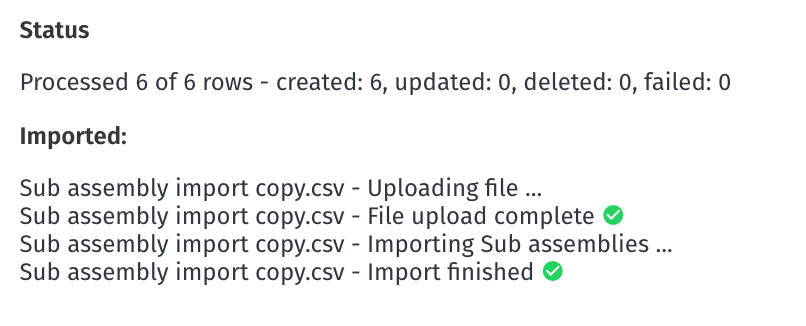
The import should only take a few seconds, and the green text in the following picture confirms a successful import.
For importing components, follow the aforementioned procedure.