Inventory management
Inventory management modelling follows these criteria:
- Component loadoff (i.e., restocking) is paused when the maximum storage capacity or total restock limit is reached.
- Component loadout (i.e., transfer to another base or the installation site) is paused when stock levels for one or more of the necessary assemblies or components hit zero.
- Assembly tasks have the following effects:
- Input components (e.g.,
Tower lower,Tower middle, andTower upper) create storage space for more of the constituent components. - Output components (e.g.,
Tower complete) occupy storage space for that component type.
- Input components (e.g.,
Stock levels
There are 3 main ways to configure stock levels:
- If a base starts out with some components, but not enough for all your assemblies and installations:
- Set an initial stock level below the total necessary for assembly and installation.
- Then, there are two options:
- Set a restock rate.
- Create transportation tasks for restocking.
- Then, there are two options:
- Set an initial stock level below the total necessary for assembly and installation.
- If a base starts out empty and you want to model the component transport to the base:
- Don't set an initial stock level.
- Then, create transport tasks for restocking.
- Don't set an initial stock level.
- If your base contains enough components at the start of the project for all your assemblies and installations, or you don't want to model transport of components:
- Set an initial stock level equal to or greater than the total necessary for assembly and installation.
- Then, neither set a restock rate nor create transport tasks for restocking.
- Set an initial stock level equal to or greater than the total necessary for assembly and installation.
Component quantities
The number of asset tasks (e.g., transport, assembly, and installation) created in your simulation are proportional to the number of asset instances in your case. For example, if you have 100 WTGs instances, there will be 100 transport tasks, 100 assembly tasks, and 100 installation tasks.
The same applies to the input and output components you add to an asset task as part of inventory management: they will replicate across each instance.
The effect of this is that you only need to add the number of input or output components for a single asset.
Some examples:
- For a WTG tower assembly task:
- Add 1
tower (lower), 1tower (middle), and 1tower (upper)as inputs - Add 1
tower (assembly)as an output.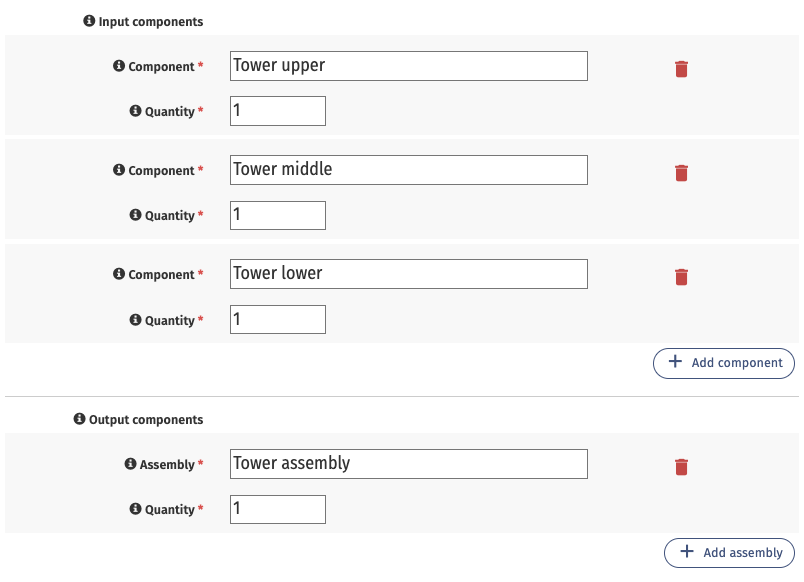
- Add 1
- For a WTG installation task:
- Add 3
blade, 1nacelle, and 1toweras inputs.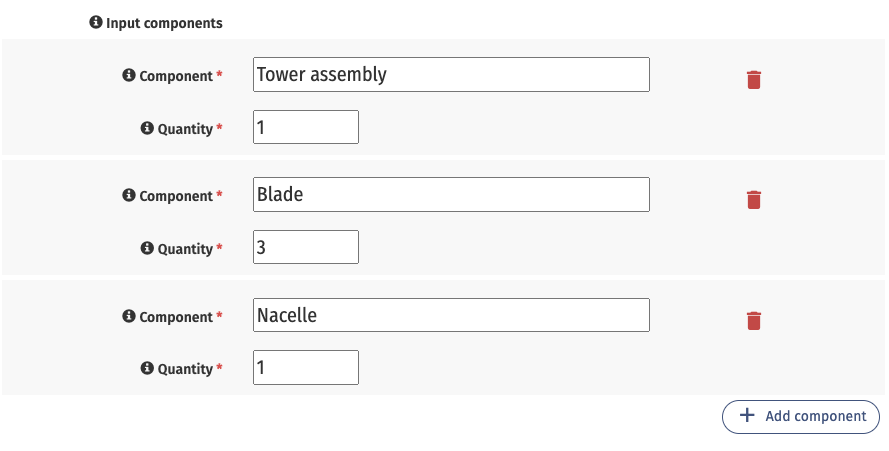
- Add 3
Logistics carry tasks, not components!
Increase the Maximum capacity parameter in the logistic's Capacity tab to increase the number of tasks it can carry out at one time. For example, if you have a transport task with 1 nacelle component, you can set the Nacelle COTV’s Maximum capacity to 3. It will then carry 3 transports tasks—-and therefore 3 nacelles-—in one trip.
Inventory management parameters
| Parameter | Required | Description |
|---|---|---|
| Component name | x | A descriptive name for your component. You will reference this in the asset tasks you create. |
| Set stock levels | Check this box to define Maximum stock level and Initial stock level values. | |
| Maximum stock level | The maximum number of this component that the base can stock. | |
| Initial stock level | Number of the component available in the case one the simulation start date defined on the Simulate tab of your case. This value must be equal to or lower than the Maximum stock level. | |
| Set a fixed restock rate | Check this box to define a custom Restock rate value. | |
| Restock rate | Automatically restock components at the base at a fixed rate. Restocking occurs without an assigned task and independently of weather limitations. Restocking pauses when the base is at maximum capacity for this component. | |
| Total restock limit | The maximum number of components that will arrive through restocking. Without setting this parameter, components will continue to arrive through restocking, even when the base has enough components to construct all the assets in your case. | |
| Set a custom restock start date | Check this box to define a Custom restock start date. By default, restocking begins on the simulation start date defined in the Simulate tab of your case. | |
| Custom restock start date. | This date must be on or after the simulation start date defined in the Simulate tab of your case. |