Azure AD integration
Configure Azure AD for Shoreline Execution
This article contains information on how you can set up Azure AD integration for Shoreline Execution. You can follow the steps from top to bottom, or click on a heading to go directly to the information:
- Add new application
- Enable single sign-on and send required information to Shoreline
- Add users to the application
Add a new application
-
Open the Azure portal dashboard
-
In the top menu, search for
Enterprise applicationsand click the Enterprise applications entry in the results menu.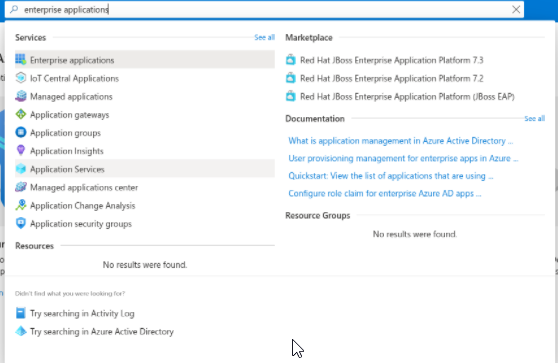
-
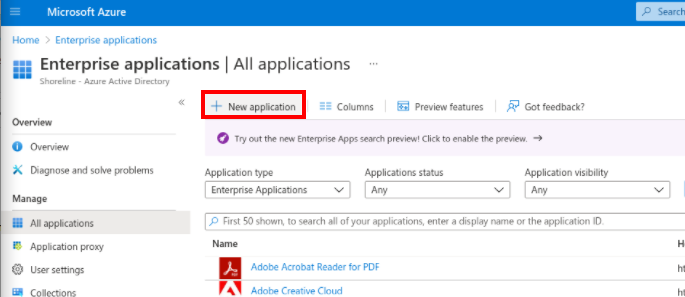
Click New application in the top left to register a new application.
-
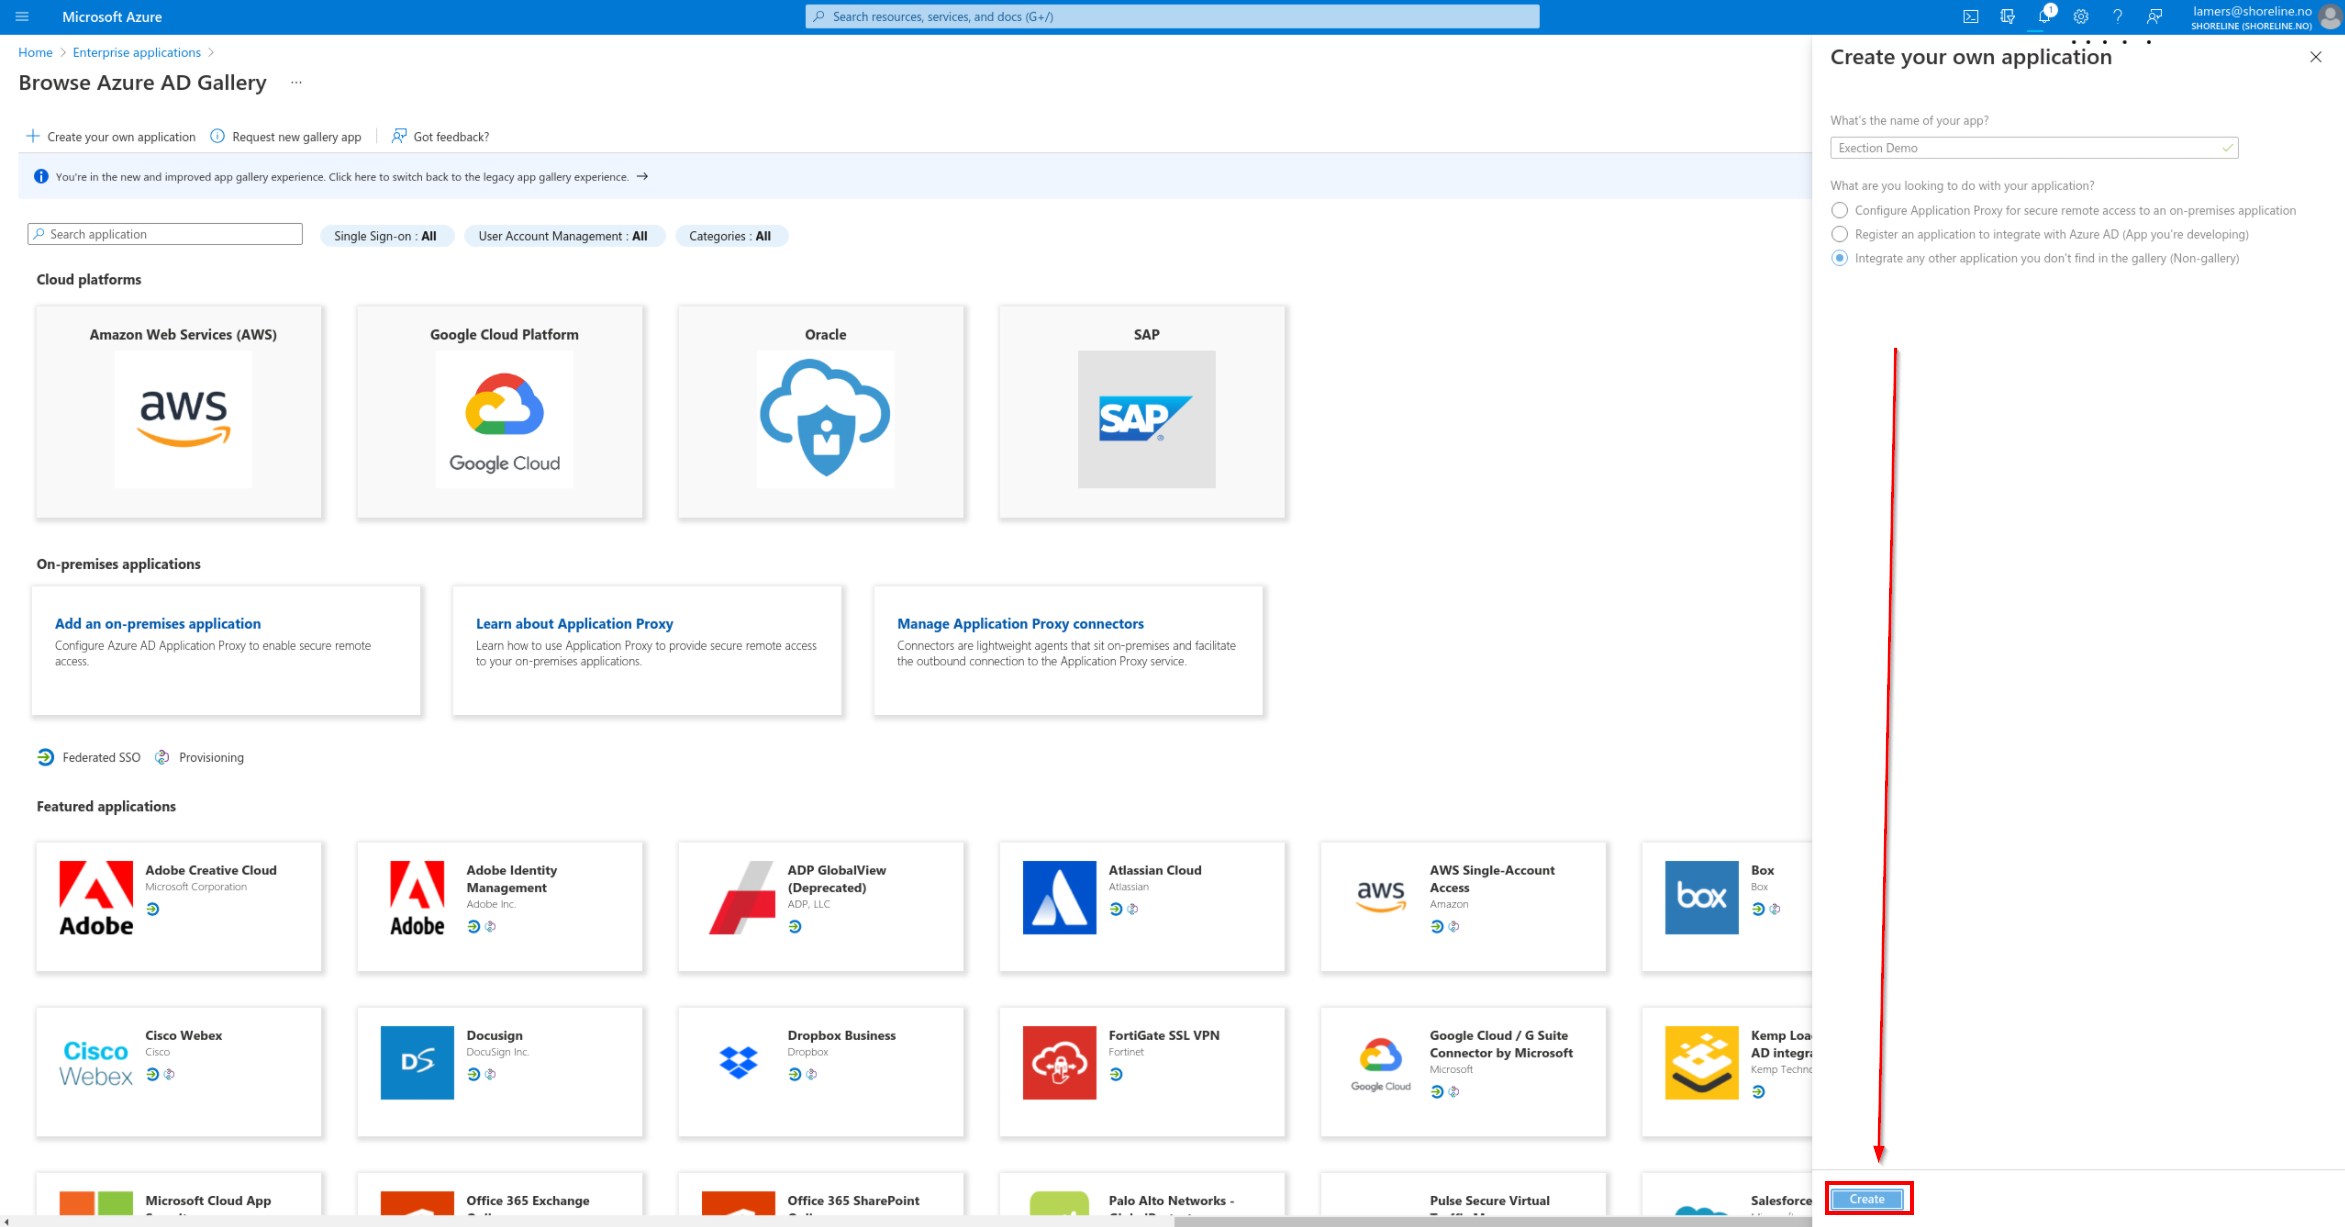
On the new page, click Create your own application.

-
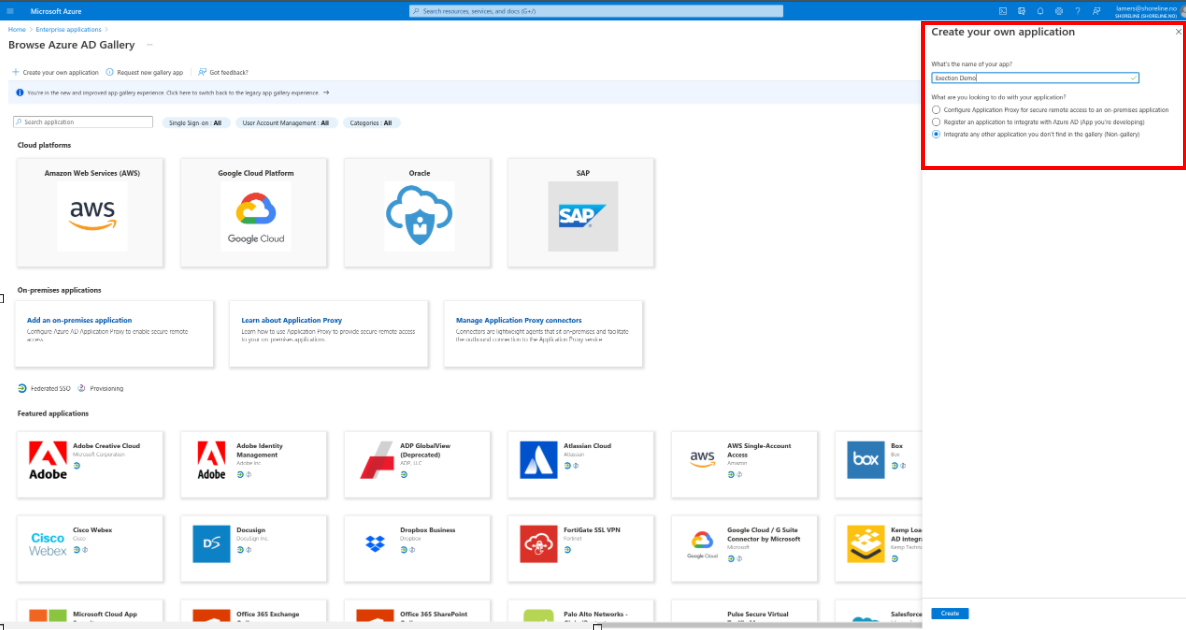
Enter name for new application, e.g.,
Shoreline Execution.A pane on the right will become visible. In the text input field, enter the name of the new application 'Shoreline Execution' that will be created. This name is used to find the application in the Azure portal for administration purposes. Make sure the last bullet is checked (Integrate any other application you don't find in the gallery (Non-gallery))
-
Click the Create button at the bottom of the side-pane. A loader will appear at the top. This can take several minutes.
Enable Single Sign-on and send required info to Shoreline
-
Enable Single Sign-on for the new application
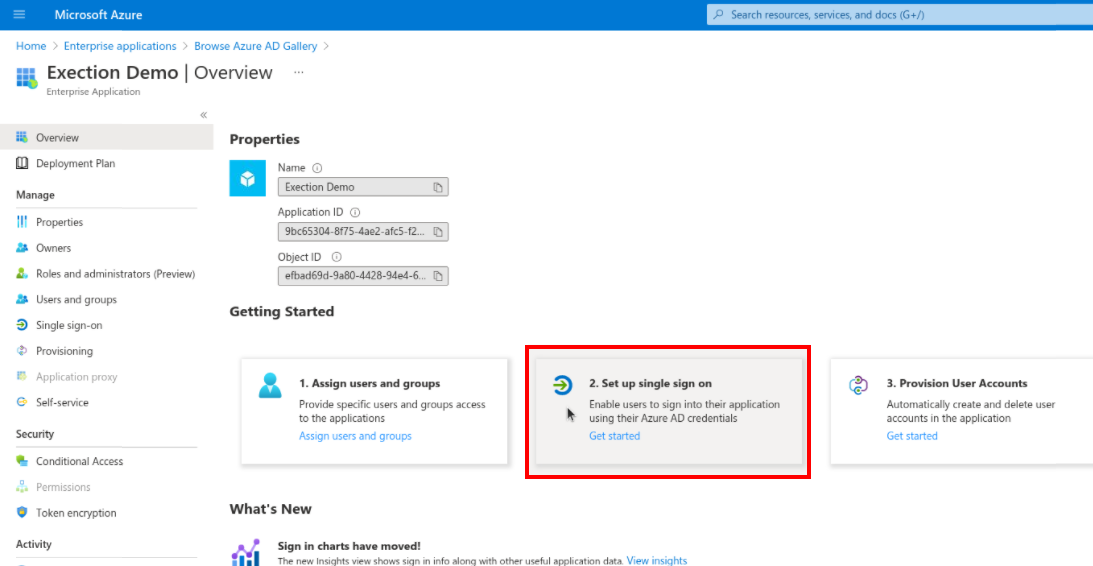
After the creating the application, the page should redirect to the application overview page. On the overview page, click the 2. Set up single sign on card.
Occasionally, the dashboard fails to load after creating the app and an error warning will be shown like shown in the image below.
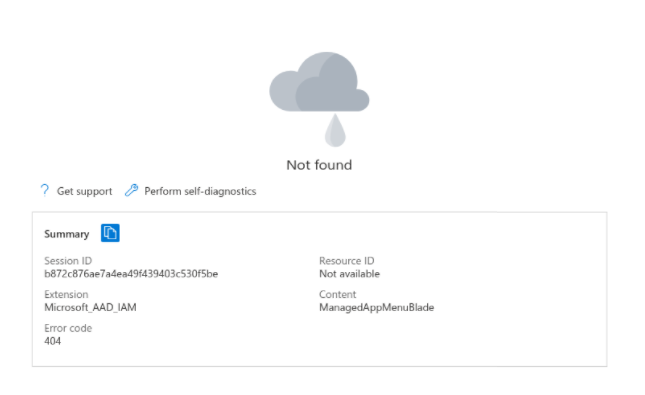
If this happens, navigate back to the Enterprise applications overview by clicking the breadcrumb at the top.
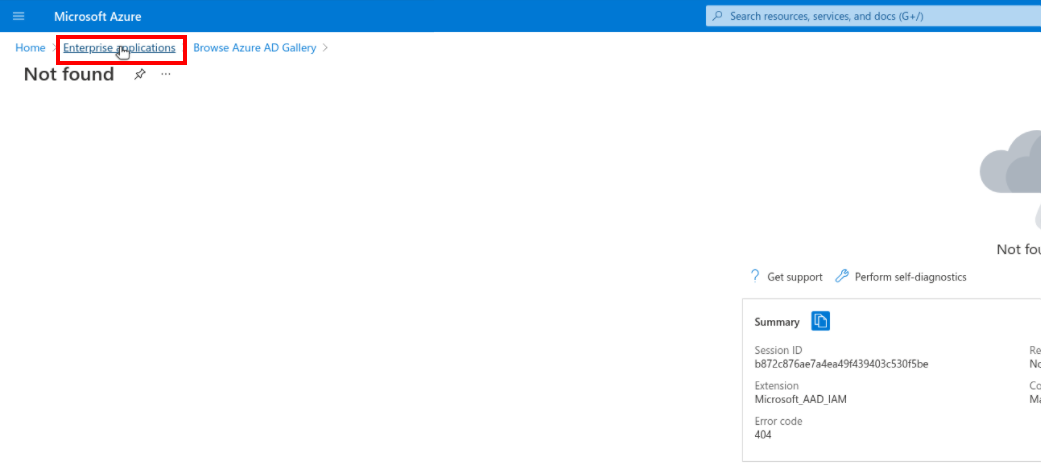
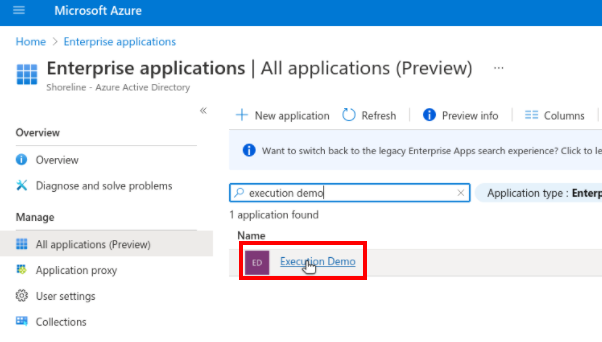
On the overview page, search for the application name that you used to create the Shoreline Execution app. The application should be listed as the search result.
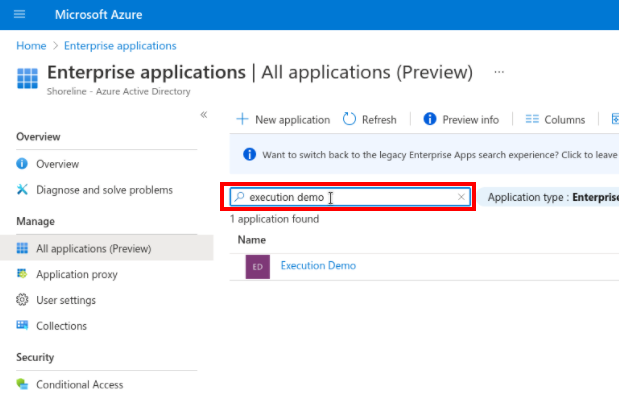
Click the application name to open the application.
-
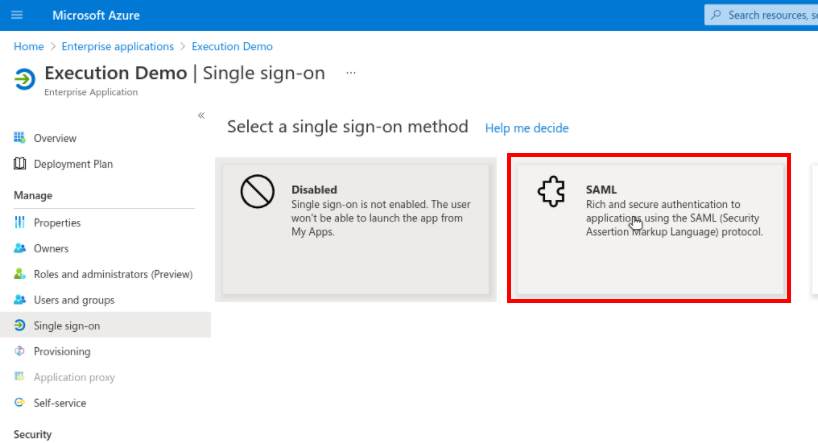
Enable SAML based authentication
In the Single Sign-on dashboard, click the SAML tile, to enable and configure SAML authentication.
-
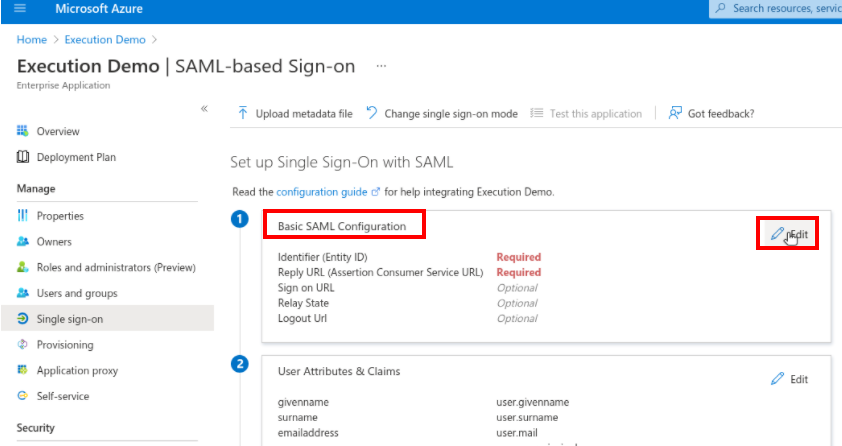
Configure Basic SAML settings
On the “Basic SAML configuration” card, click the edit icon.
A new pane opens on the right. Under Identifier (Entity ID), fill out a unique identifier for the application. It is suggested to use the domain that will be used for the application.

Under Reply URL the following URL must be entered:
https://ex.<company url>.shoreline.no/api/login/adresponseClick Save on the top of the pane to save the entered settings.
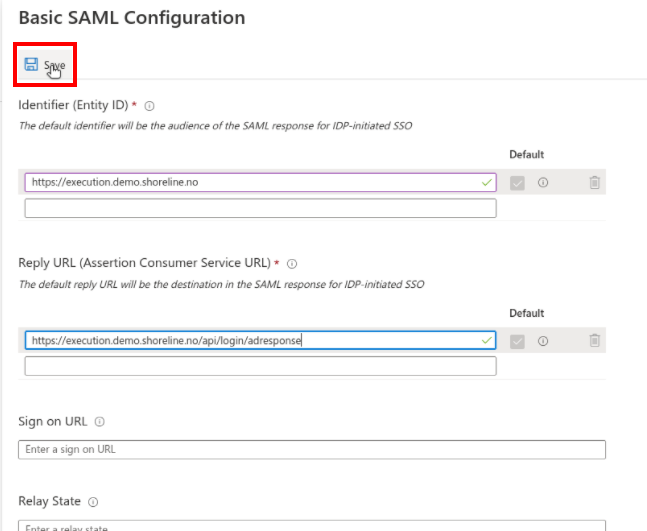
There seems to be a bug that the Reply URL is not saved properly. If a yellow warning message is shown, click the message to save and apply the settings.

-
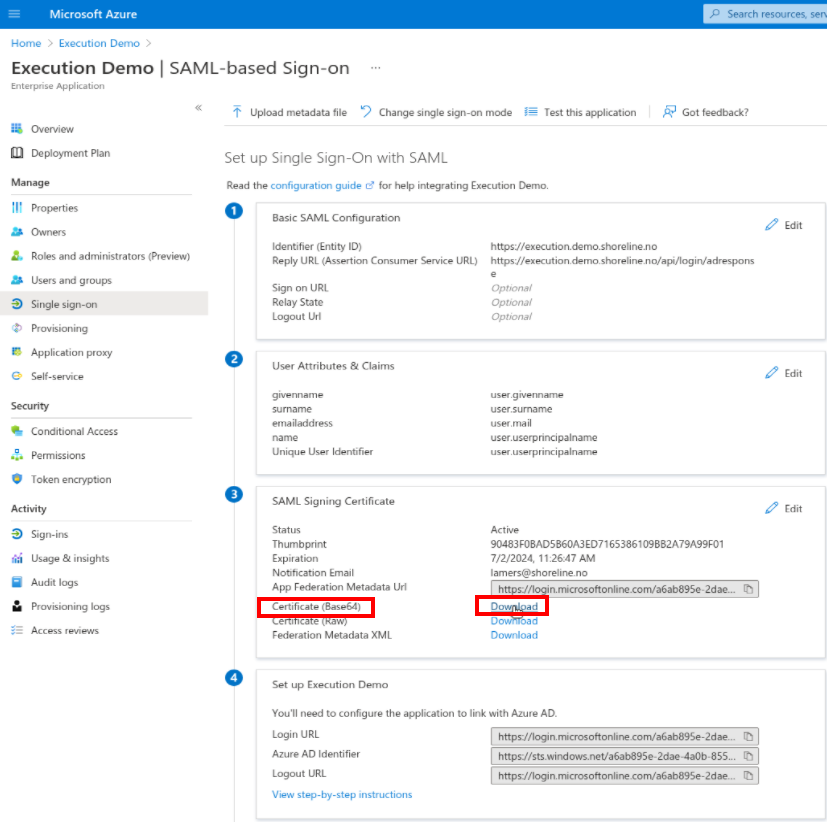
Obtain required SAML configuration parameters
To integrate with Shoreline Execution, three parameters must be shared with Shoreline.
First is the Identifier (Entity ID). The Identifier must be copied exactly how it's shown in Azure and shared with Shoreline customer support, as this user needs to be added as a user in the Execution tool.
Second is the Certificate. Click the Download button next to Certificate (Base64). This will download the SAML certificate. This certificate must be send to Shoreline customer support.
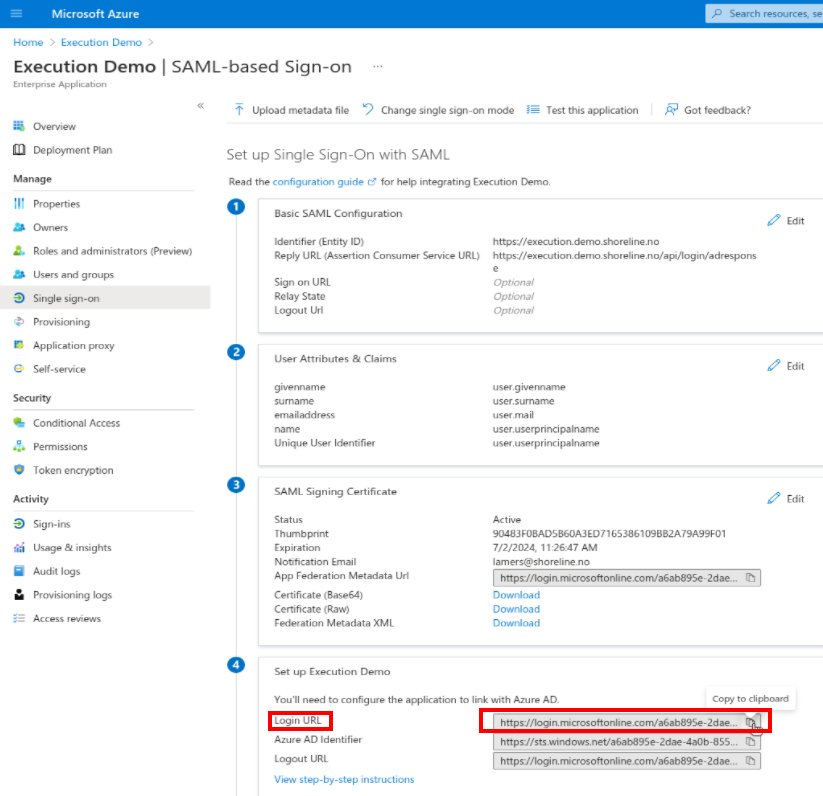
Next, under Set up Execution demo, click on the Copy to clipboard button next to Login URL. This link must also be shared with Shoreline customer service.
-
Send information to Shoreline customer support
By now, SAML has been configured to integrate with Shoreline Execution. For finalize the integration, Shoreline needs three parameters:
- Identifier (Entity ID)
- Certificate (Base64)
- Login URL
These three parameters need to be send to Shoreline customer service.
Please gather and send these three parameters in an email to Shoreline customer support at support@shoreline.no.
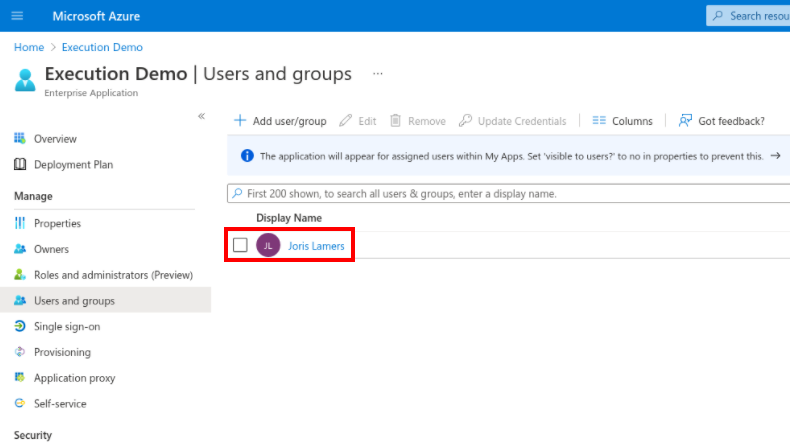
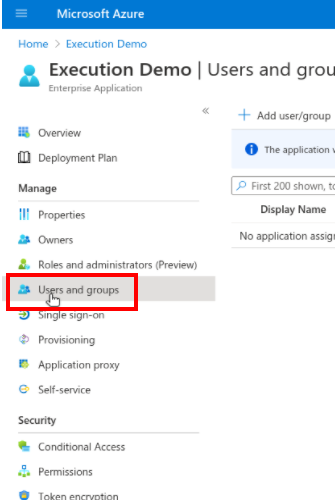
Add users to the application
Please note that all users who have to access Shoreline Execution will also have to be added in Execution - the email for the user needs to be identical to the email setup in Azure.
The next step of the integration is to allow users to use the application.
-
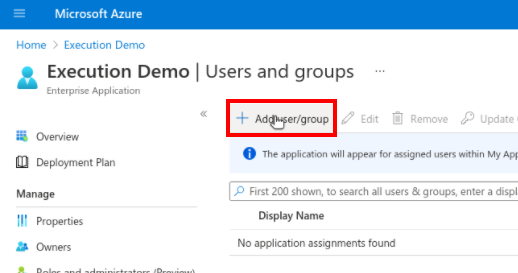
In the left menu, click Users and groups.
-
In the new dashboard, click Add users/groups in the top bar.
-
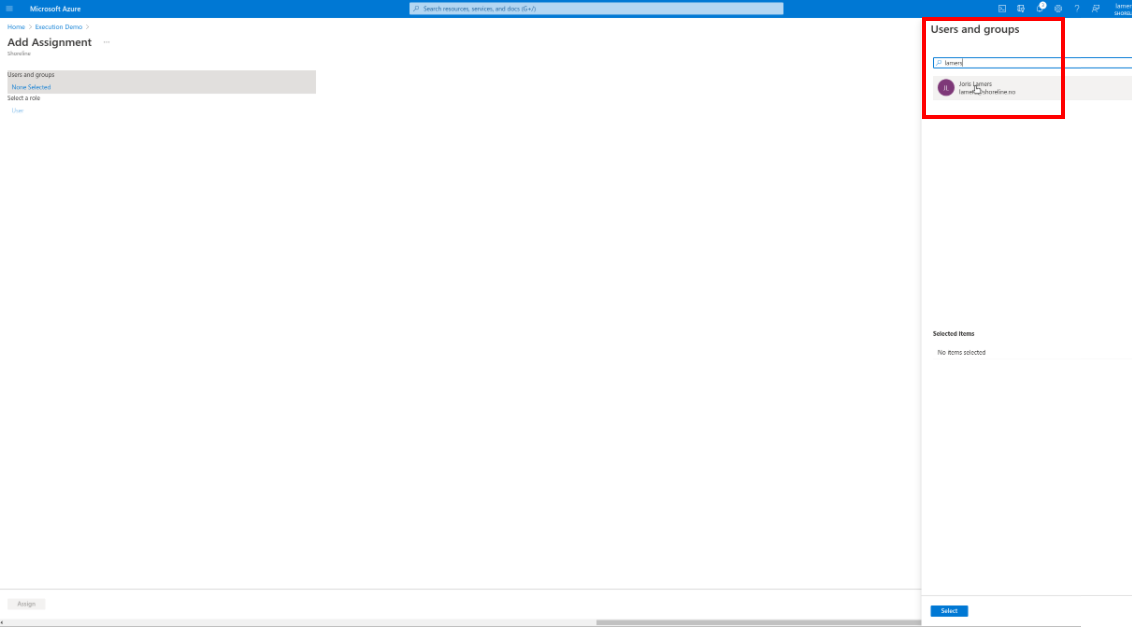
On the new page Add Assignment click None selected to open the user assignment menu. A pane on the right will open.

-
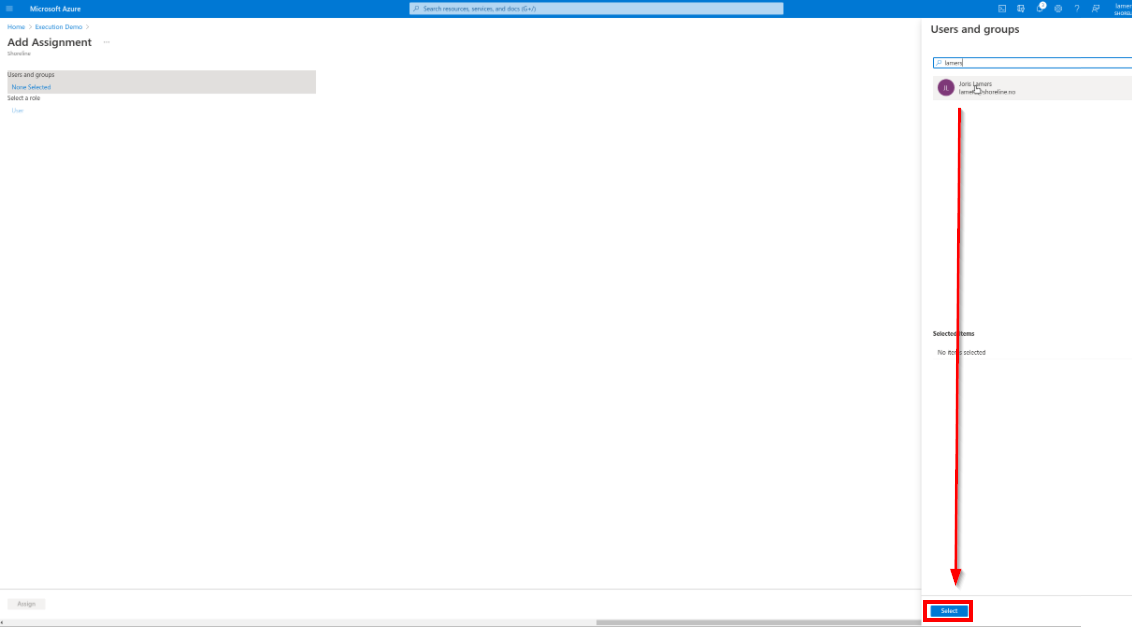
In the user pane, search for the users to add and click the user to select it.
-
Click the select button at the bottom to select the users.
The role for the user will be automatically set to User. For now it is not possible to manage user roles trough Azure AD.
-
Click Assign in the bottom left to assign the selected users to the application.
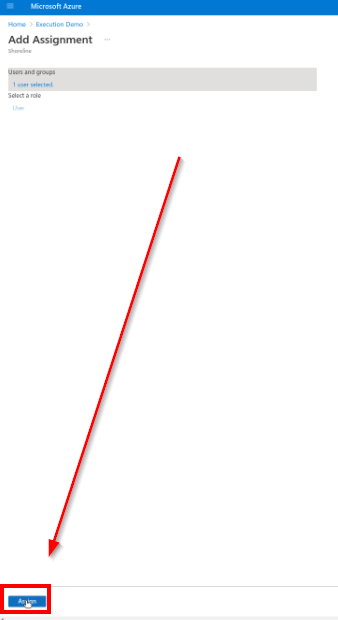
The assigned users can now use their Microsoft credentials to log into Shoreline Execution.