Manage inventory
Managing base storage and associated bottlenecks is a key aspect of a successful construction project. Inventory management is a base- and asset-level solution to flexibly manage component storage, assembly, and transport within Shoreline Design.
Follow our Getting started: Build a Construction floating case to run your first simulation using inventory management.
Inventory management is built to answer key concerns around delivery bottlenecks:
- How will base storage and port capacity affect project delivery?
- Model different storage capacities to measure the impact on installation time.
- Itemize components at all bases throughout the project timeline, from the manufacturing location to the pre-assembly port to wet storage.
- How can I maximize my use of vessels and base capacity?
- Model in detail the different stages of component assembly.
- Define component restock rates to estimate the most efficient use of base storage.
- Set a maximum stock level per component at a base and define a constant flow of components into the base to reduce the likelihood of assembly cranes or jack-up vessels standing idle.
- Model component transfer, including vessel capacity, from port to wet storage to installation site to optimize transport timelines.
There are two steps to using inventory management in your cases:
- Add component to a base in your project. Here, you can manage the base capacity for those components and set regular restock timings.
- Add the components you have created to transport, assembly, and installation tasks on any assets you add to your case. Use tasks to model the assembly and movement of components.
Add components to a base
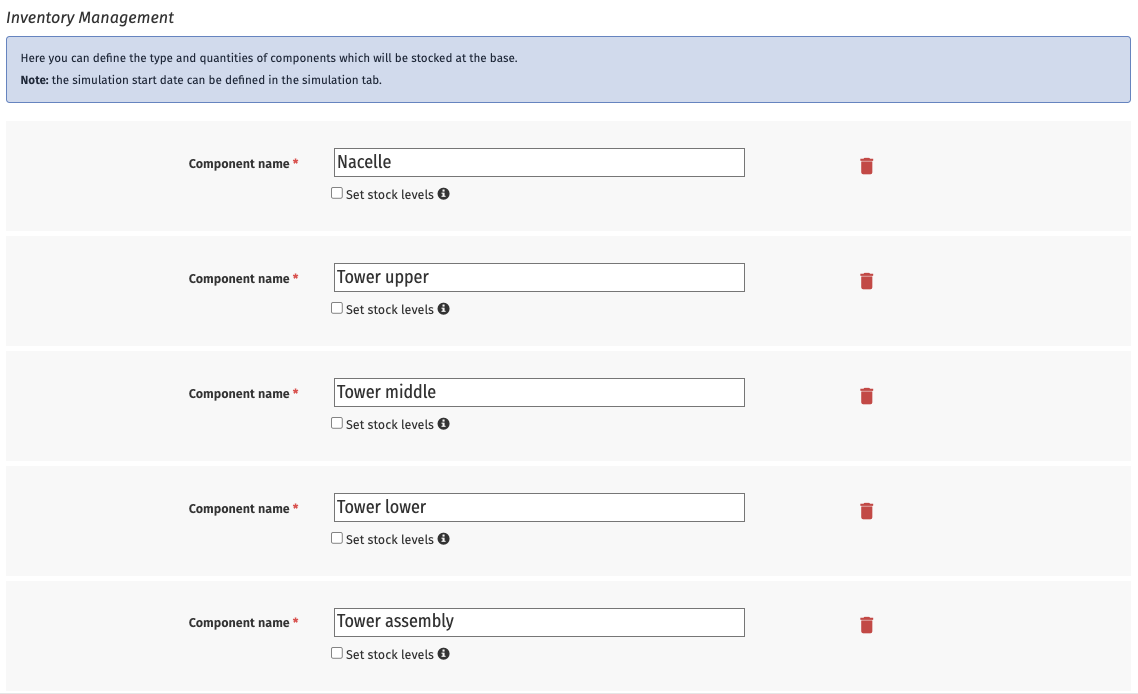
Define any components you want in your case inventory and set maximum stock levels and restock limits timings.
Two important notes when creating components:
- Add component section as well as the completed component. For example:
- If you create
tower upper,tower middle, andtower lowercomponents, create atower assemblyor similar component for the post-assembly construction or output.
- If you create
- When modelling transport of components between bases, add the necessary components to all bases involved.
- Set stock levels accordingly, e.g., the start base for a component might have an initial stock level of
3nacelles, whereas the destination base will have an initial stock level of0.
- Set stock levels accordingly, e.g., the start base for a component might have an initial stock level of
Instructions
- Open a Shoreline Design Construction case with a base.
- Click on the Build tab.
- Click on Bases.
- Click on the relevant base to open the base details page.
- Click on the Inventory management tab.
- Click + Add component at the bottom right.
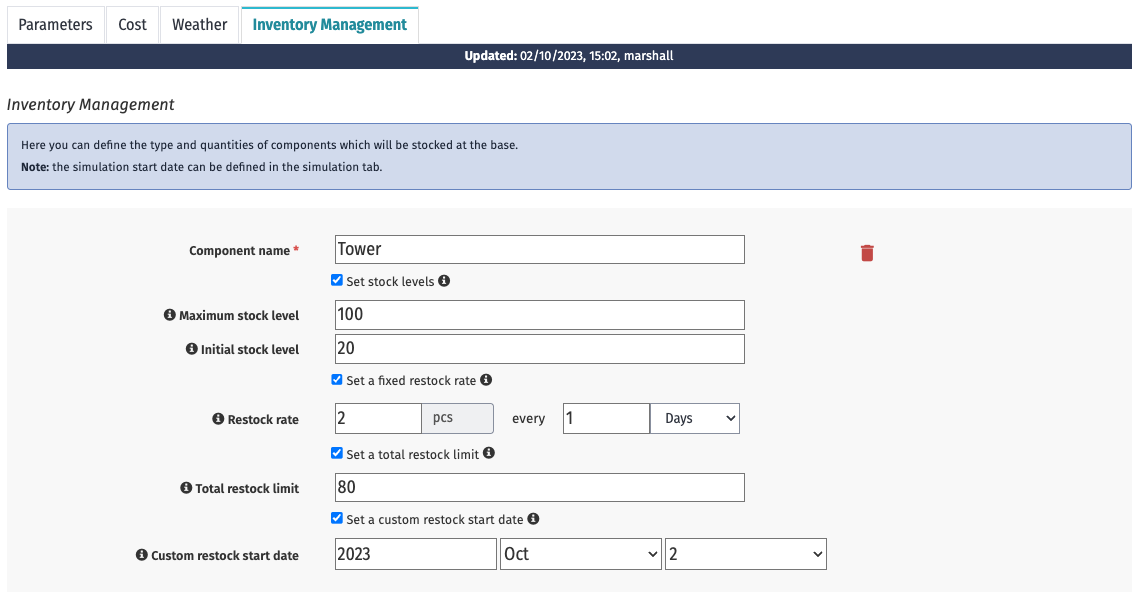
- Enter a name for your component.
- Apply any optional parameters you require:
- Check Set stock levels to define the storage space available for this component at the base and the initial stock level.
- Check Set fixed restock rate to define automated restocking of this component at the base. If you do not use a fixed restock rate and your Initial stock level is below that required for all asset instances in your case, you will need to create transport tasks to model components arriving at the base.
- Check Set a total restock limit to define the maximum number of components that will arrive through restocking. Without setting this parameter, components will continue to arrive through restocking, even when you have enough components to construct all the assets in your case.
- Check Set a custom restock start date to define when components begin arriving at the base. By default, restocking begins on your simulation start date, set in the Simulate tab of your case.
- See the How inventory management works page and Inventory management parameters sections for further details on these optional parameters.
- Add additional components by repeating steps 6–-8.
Add components to asset tasks
Components you add to your base inventory become available on asset transport, assembly, and installation tasks within your case.
Transport and installation tasks only require input components. Assembly tasks require input and output components.
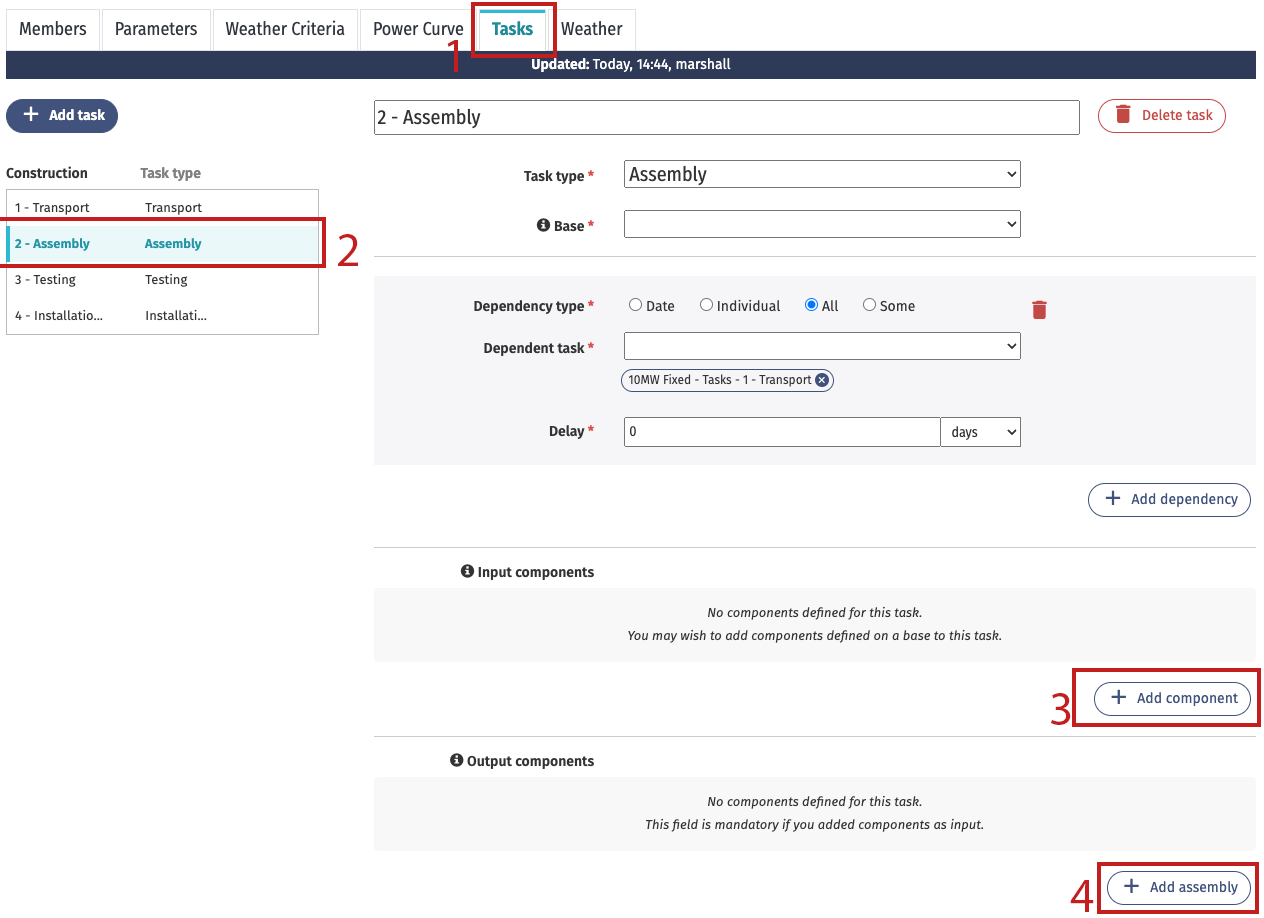
Instructions
- In the Assets tab of your case, click on the relevant asset.
- Click on the Tasks tab.
- Select the relevant task from the left-hand side.
- In the Input section, click + Add component.
- Begin typing the component name, and select the component name from the dropdown.
- Enter the required quantity of the component. See the Component quantities section of the How inventory management works page for more information.
- Add any additional input components using the + Add component button.
- If you're modelling an assembly task, add the output component following the same procedure but in the Output section.
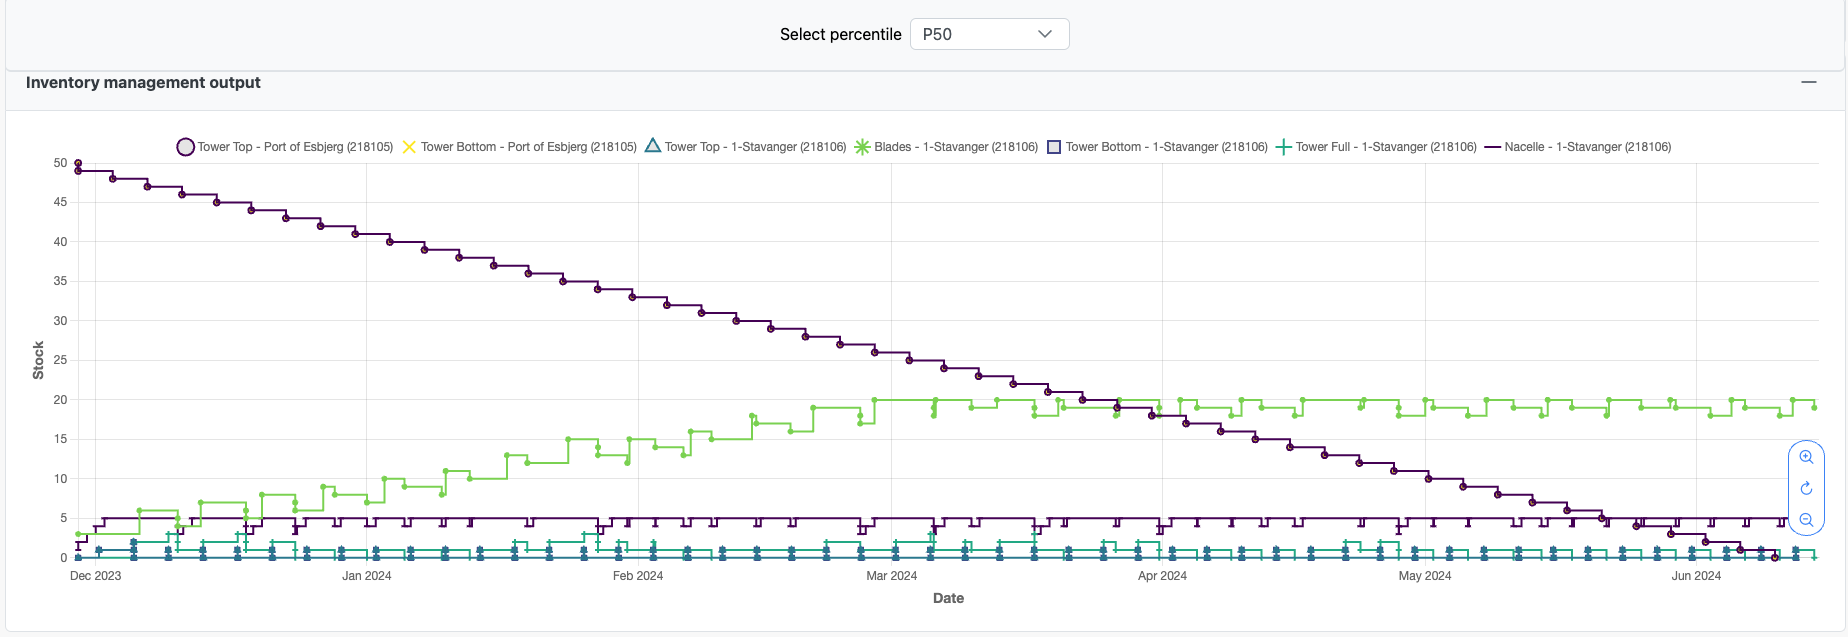
View the inventory management output graph
After running a simulation on your case, go to the Output tab, click on Run-specific and scroll down to find the inventory management graph.
The graph displays the component stock level changes during the selected simulation p run.
You can toggle individual components on and off in the graph by clicking the component name at the top of the graph.